Two protocols are shaping the AI revolution: A2A for agent-to-agent delegation, and MCP for agent access to tools and external systems. A2A expands who can participate in a workflow by enabling agent-to-agent delegation. MCP expands what agents can reach by connecting them to data and systems.
By the end of 2026, task-specific AI agents are expected to appear in 40% of enterprise applications, up from less than 5% in 2025. That shift changes where security has to live. Controls that once sat around the application now need to travel with the task as it moves from a user to an agent, from one agent to another, and from an agent into a business system.
AI Agents in the enterprise are a certainty at this point. The real question is whether you can enforce agent access control at runtime based on the requesting identity, the current task, the target system, the requested action, and the allowed duration. Neither protocol is inherently more secure, and A2A and MCP introduce different risks.
A2A Structures the Agent-to-Agent Handoff, But Not the Business Decision
A2A, or Agent2Agent, is an open standard for communication and interoperability between independent AI agent systems. Its purpose is to let agents discover each other, exchange context, collaborate, and delegate work across multi-agent workflows.
A2A is not trying to replace how agents access tools or data; that is the role of the MCP protocol. It is focused on how agents coordinate with each other to complete work across multiple systems.
As such, the answer is not that A2A is more secure than MCP, or that MCP is more secure than A2A. They create different trust boundaries. A2A creates delegation risk: should this agent be allowed to pass work, context, or authority to another agent?
MCP Standardizes Tool Access, But Scope Still Matters
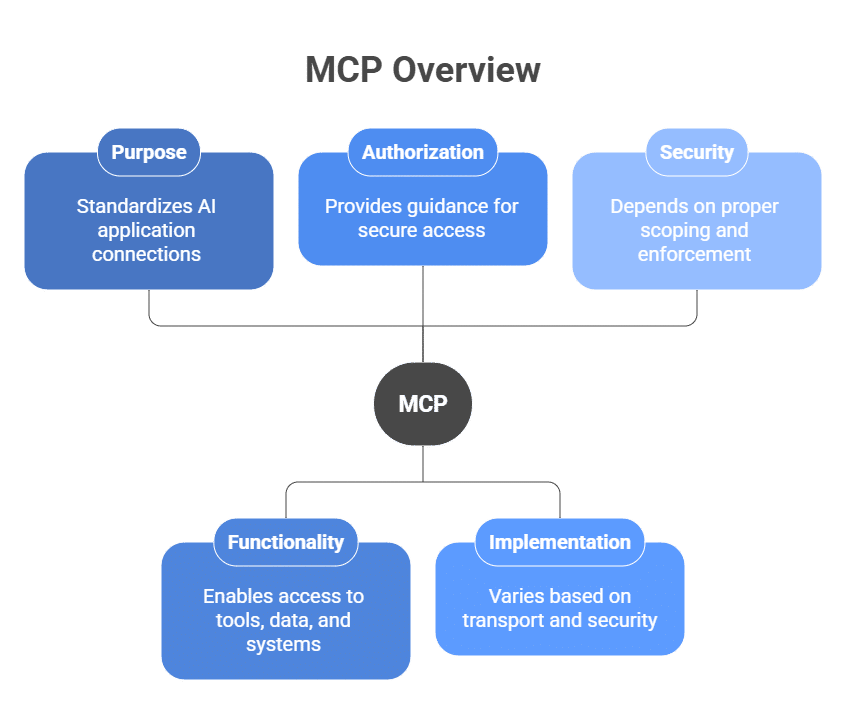
MCP (Model Context Protocol) is a protocol for connecting AI applications and agents to tools, data, prompts, and external systems. It defines how agents access capabilities in a consistent way, instead of relying on custom integrations for each service.
Where A2A is about delegation between agents, MCP is about access to capabilities. If an agent needs to call an API or pull context from an external source, MCP is the layer that standardizes that connection. That makes API security a critical part of MCP governance, because the API is often where an agent’s request turns into real data access or downstream action.
MCP includes authorization guidance for HTTP-based transports and follows OAuth-based conventions, but it does not choose an enterprise’s identity model, permission boundaries, approval rules, or runtime enforcement logic.
When authorization is supported, HTTP-based MCP implementations should follow the MCP authorization specification. STDIO-based implementations work differently and should retrieve credentials from the local environment.
That makes MCP security highly dependent on implementation. A well-scoped MCP implementation can limit an agent to one approved operation. A poorly scoped connection can give the same agent broad read or administrative access behind a single tool.
MCP creates tool-action risk: should this agent be allowed to use this tool against this resource for this operation right now? When both protocols are used together, the risk becomes a chain-of-authority risk. A task can start with a human request, pass through multiple agents, and end with a tool call to a sensitive system. Every step needs its own authorization decision.
Table 1: Where A2A and MCP Create Different Access Questions
Control dimension
A2A key question
MCP key question
Origin
Who initiated the task?
Which tool is being called?
Boundary
Which agent is receiving the task?
Which resource is being accessed?
Context
What context is being passed?
Is the action read-only, write-level, or destructive?
Authority
What authority is being delegated?
What token or credential is being used?
Propagation / expiry
Can the receiving agent delegate again?
When does that access expire?
Most Enterprises Will Use A2A and MCP Together
Most enterprises will not choose between A2A and MCP because one looks safer than the other. As agent workflows become more operational, teams will need a way to coordinate with other agents and a way to act on systems.
They solve different problems and will often appear in the same workflow. A2A lets agents divide work across a multi-agent AI system. MCP lets those agents retrieve context, call APIs, and act on external systems. For example:
A user asks an agent to complete a task.
That agent delegates part of the task to another agent through A2A.
The downstream agent then uses MCP to call a tool, retrieve context, or act against a business system.
The original request may be legitimate, but the downstream action can still be too broad or too privileged. Security teams need to preserve the full chain: initiating user, initiating agent, delegated agent, tool call, target resource, action, approval, and expiry.
Without that provenance, teams may know that an agent performed an action, but not which user, workflow, approval, or delegated step caused it. This is where the agentic identity crisis starts: you gain more automated actors, but less clarity into who or what is responsible for each action.
When these protocols are layered, the blast radius grows. The risk is not limited to one agent with excess access. The risk is delegation, identity, tokens, scopes, and approvals compounding across layers.
The Core Security Differences Between Agent Delegation and Tool Connectivity
A2A changes the trust boundary between agents. When one agent delegates part of a task, it can pass along context and implied authority to the next agent in the chain. That means access and decision-making are no longer contained within the first agent.
Should the second agent be allowed to handle the request at all? If it can, teams then need to decide how much context to provide and whether it can continue the chain by delegating to another agent.
MCP changes the trust boundary between an agent and a system. Once an agent can call a tool, the risk comes down to what that connection allows. This becomes even more important when agents interact with third-party tools or vendor-managed systems, where access decisions can introduce broader third-party risk monitoring challenges.
If the permissions are too broad, the agent can access data or make changes beyond the original task. The issue is the scope of access behind the connection.
Consider a support agent connected to billing through MCP. A customer asks for a refund on one failed order. If the MCP connection uses a broad billing token, the agent may be able to refund other orders, change account balances, issue credits, or read unrelated billing records. MCP gives the agent a path into the system, but the permissions behind that path decide how much damage or overreach is possible.
The MCP connection did not create the business risk on its own. The risk came from giving the agent a reusable credential with more authority than the task required.
The Protocol Debate Misses the Real Problem
The protocol comparison is secondary to this conversation. In today’s cyber threat landscape, production security depends less on which protocol an enterprise chooses and more on its ability to govern both protocols at runtime.
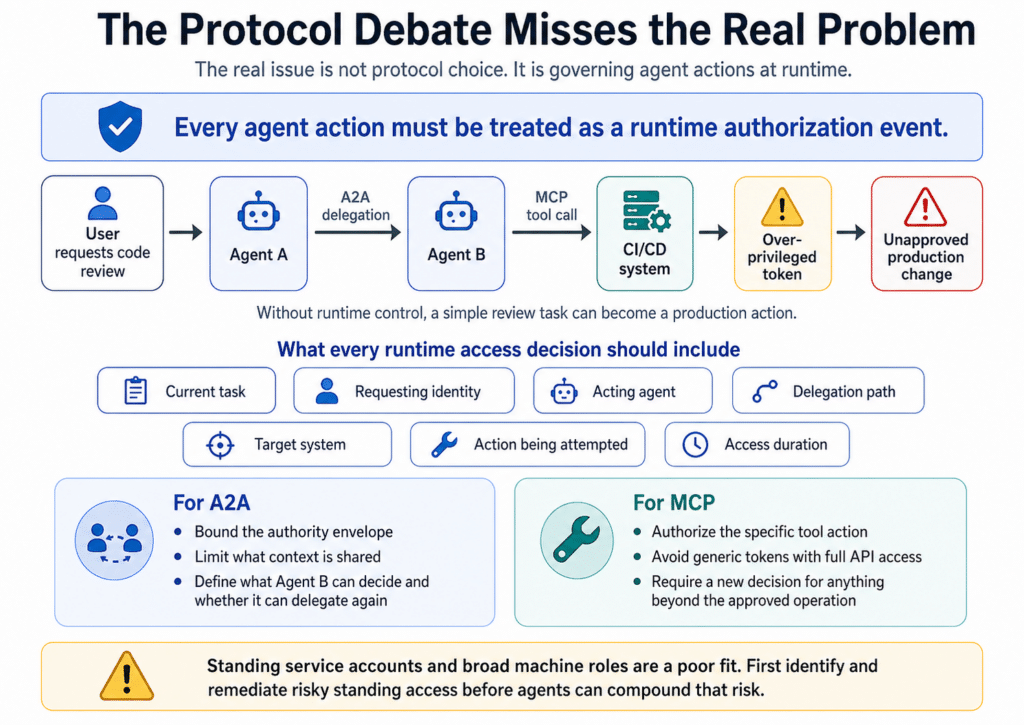
Without that control, the blast radius can expand quickly. An agent handling a code change request may delegate validation to another agent through A2A. That downstream agent then uses MCP to interact with the CI/CD system through a token that also allows deployments. A simple review task turns into an unapproved production change because the downstream agent had too broad access.
To guard against this, every agent action must be treated as a runtime authorization event. An agent should not inherit broad access because it belongs to a trusted workflow. It should receive a permission grant that is narrow, task-specific, and time-bound. That grant should be tied to the:
Current task
Requesting identity
Acting agent
Delegation path
Target system
Action being attempted
Access duration
For A2A, delegated work needs a bounded authority envelope. If Agent A sends a task to Agent B, the handoff should include clear limits on what context can be shared, what Agent B can decide, and whether Agent B can delegate again. The receiving agent should not automatically inherit the full authority of the initiating agent or substitute its own broader access.
For MCP, the same model applies at the tool boundary. A tool call should not run through a generic token with full API access. The call should be authorized against the specific operation being requested, such as reading one ticket, updating one record, or triggering one approved workflow. Anything beyond that needs a separate authorization decision.
Static access models built on standing service accounts and broad machine roles are a poor fit here. Teams first need to identify where risky standing access exists, then reduce or remediate it before agents can compound that risk.
The Real Control Point Is Runtime Access
Runtime enforcement is critical, regardless of protocol choice. Some organizations may rely more heavily on A2A or MCP, but the access problem does not change. Agent systems need narrow, temporary controls tied to the task being performed. That applies across human and agentic identities as well as non-human identity management.
Agent security now looks like modern privileged access management. The goal is not to block agents or slow developers down. It is to make sure each action receives only the access it needs, only when it needs it, with a clear record of who or what initiated it.
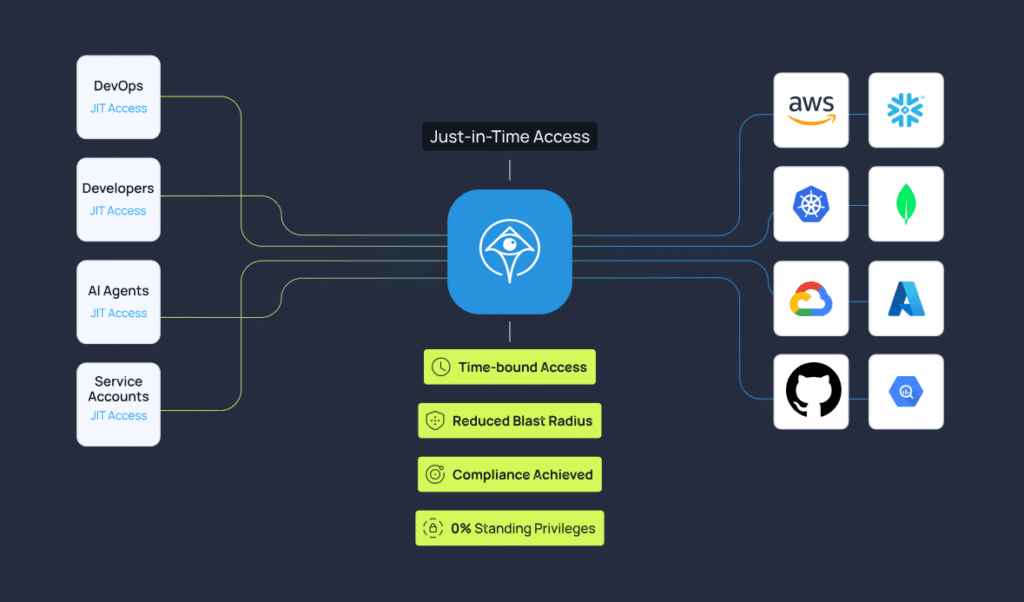
A stronger model is dynamic least privilege: just-in-time, just-enough access, in which the agent receives only the permissions needed for the current action and loses them once the action is complete. Apono helps cloud-native teams automate that model across human, non-human, and agentic identities, so permissions are scoped, approved, observable, and automatically revoked.See how to secure AI agents with dynamic, just-in-time access. Alternatively, explore the Agent Privilege Lab.
Why the GitHub Breach is a ZSP Wake-Up Call
A GitHub breach occurred on May 18, 2026 when a threat actor called TeamPCP pushed a malicious version of Nx Console (a widely used VS Code extension with 2.2 million installs) to Microsoft’s official Visual Studio Marketplace. The compromised version was live for eighteen minutes before being pulled, but in that window, it ran a credential stealer on every machine that auto-updated, harvesting GitHub tokens, AWS keys, SSH keys, and password manager material from developers’ local environments.
No exploited vulnerability or brute force, just a stolen token with no guardrails to limit how far it could reach.
How it happened
The attack follows a pattern that TeamPCP has refined across more than 500 open source tools in 2026 alone. The group identifies widely used developer tooling, compromises a publisher account or contributor token, and pushes a malicious version through the official distribution channel. The poisoned package runs a credential stealer the moment it executes, exfiltrating secrets from the developer’s local environment. Those credentials are then used to compromise additional tools, whose users become the next wave of victims.
In this case, the entry point was the Nx Console extension. The payload harvested credentials silently and automatically, reaching every developer with auto-updates enabled. GitHub detected the intrusion, isolated the affected endpoint, and began rotating credentials. But by then, the repositories had already been cloned.
Standing privileges were the real vulnerability
The supply chain angle is real, and the Nx Console compromise deserves scrutiny. But focusing on the delivery mechanism obscures the more consequential failure: the stolen credentials had access to 3,800 repositories because that’s what the developer had been persistently provisioned to access.
This is how GitHub access works at most organizations, and GitHub itself was no exception. Repository permissions, org membership, and clone access accumulate over time and rarely get revisited. There is no active work session to expire, no task scope to enforce. Access persists indefinitely, which means a stolen credential carries the full weight of everything that employee has ever been granted.
The attacker didn’t need sophistication. They needed one valid credential attached to enough standing access to make the theft worthwhile. In this case, that threshold was cleared by a wide margin.
What Zero Standing Privilege changes
Under a Zero Standing Privilege (ZSP) model, no user – human or machine – holds persistent access to systems or resources by default. Access is granted just-in-time, scoped to a specific task, and expires when the work is done. The principle is already standard practice for cloud infrastructure and production database access at security-mature organizations, but is considerably less common in developer environments.
Applied to the GitHub breach, the impact is direct: a stolen token from a developer’s machine reflects only what they were actively authorized to do at that moment rather than the accumulated permissions of their entire tenure. If that developer had been granted JIT access to a specific set of repositories for an active project, the credential theft still happens, but the cloned repository count does not reach 3,800.
That’s the difference between a contained incident and a breach of this scale.
GitHub is just the latest example
For teams that have already applied rigorous access controls to cloud infrastructure and production databases, the GitHub breach surfaces a gap that is easy to overlook: developer environments are a privileged access surface, and they are frequently governed as if they are not.
Apono’s GitHub integration brings ZSP enforcement to repository access, utilizing just-in-time grants tied to active work, automatic expiration, and full audit trails across every access event. It applies the same access architecture that security teams have already adopted for cloud and database access to the environment where source code, deployment logic, and infrastructure configuration actually live.
But the principle extends beyond repositories. The same Nx Console payload that harvested GitHub tokens also harvested AWS keys and cloud credentials. If the most sensitive assets in your environment are in cloud infrastructure, standing IAM roles and persistent cloud access are the exposure to address. If they are in production databases, persistent query credentials carry the same risk. The access architecture is the same across environments, the entry point just depends on where the attacker lands first.
The relevant question is not which environment needs ZSP enforcement. It is which environment an attacker will use to pivot into the rest.
The access story underneath the supply chain story
Supply chain attacks are a delivery mechanism. What they delivered is credential theft, and the blast radius of a stolen credential is determined entirely by how much standing access is attached to it.
For organizations that have already made standing access the exception rather than the default, a breach like this is a contained incident with a limited blast radius. For those that haven’t, the attacker’s only limit is how far the credential reaches.
Want to see where standing access is creating risk in your environment?
Explore how Apono helps security teams replace persistent access with just-in-time, just-enough privileges across modern infrastructure.
15 Best Zero Trust Network Security Tools [By Category]
Trust is expensive. The wrong zero trust network security tool can leave you with more standing access and more risk than you started with.
In today’s modern and complex environments, this sentiment matters more than ever. 22% of breaches involved credential abuse as the initial access vector.
In this guide, we break down the best zero trust network security tools by category, helping you choose the optimal solution for your requirements.
What are zero trust network security tools?
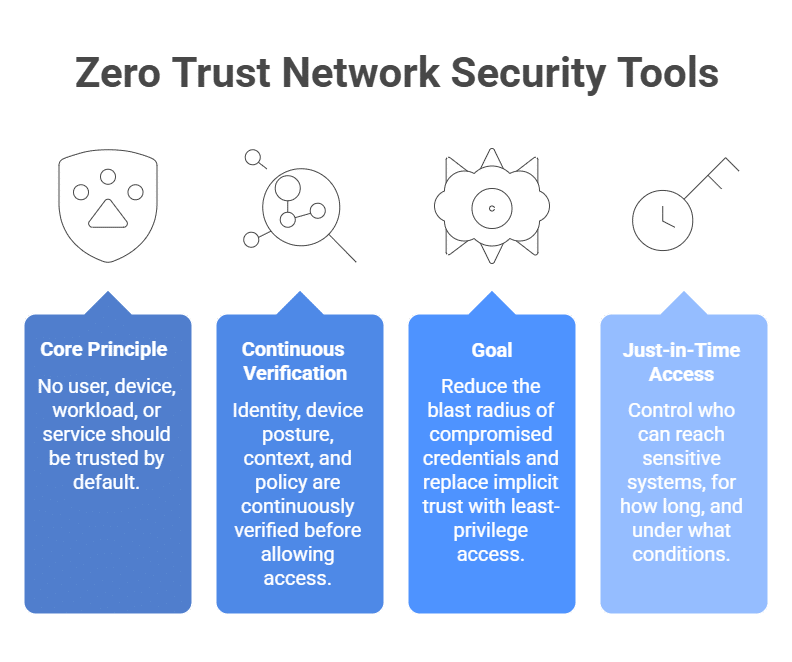
Zero trust network security tools enforce one simple idea: no user, device, workload, or service should be trusted by default. Instead of granting broad, persistent network access, zero trust network security tools continuously verify identity, device posture, context, and policy before allowing access to specific apps, systems, or data.
The goal is to reduce the blast radius of compromised credentials and replace implicit trust with tightly controlled, least-privilege access. In practice, that means different tool categories solving different parts of the problem, as we will explore in this comprehensive list.
Most relevant are Just-in-Time access tools, which control who can reach sensitive systems, for how long, and under what conditions. That makes these tools especially relevant for cloud-native teams that need stronger security without slowing developers down.
It’s also important to clear up a common misconception: zero trust network security tools are not just firewalls or IAM platforms with a new label. They are part of a broader zero trust architecture built around the principles of zero trust that combine identity, access, segmentation, and continuous verification. If you’re managing sensitive cloud resources or hybrid infrastructure, zero trust tooling quickly becomes a practical requirement rather than a nice-to-have.
Top Picks at a Glance
Recommended for cloud-native SaaS and regulated engineering teams that need to remove standing access to infrastructure, databases, and internal apps without slowing developers down: Apono
Recommended for teams that want identity-aware access to internal apps and services: Pomerium
Recommended for IT teams that want simple, identity-based access to infrastructure: Tailscale
Recommended for enterprises that want to deploy identity-based microsegmentation without ripping up the network: Elisity
Recommended for OT, industrial, and cyber-physical environments that need secure remote access: Cyolo
Comparison Table: Best Zero Trust Network Security Tools Compared
Tool
Best for
Key strength
Key limitation
Pricing (starting)
Setup effort
Apono
Cloud-native teams replacing standing privileged access
Automated JIT access across infra and apps
Not a full ZTNA or microsegmentation platform
Custom quote
Low
Pomerium
Identity-aware access to internal apps and services
Strong privileged access controls and auditability
More infrastructure-focused than general ZTNA
By inquiry
Med
ThreatLocker
Controlling endpoint admin rights
Strong privilege elevation and device controls
Less focused on cloud-native infra workflows
By inquiry
Med
Elisity
Microsegmentation without major network changes
Low-friction identity-based segmentation
Not built for privileged access workflows
By inquiry
Med
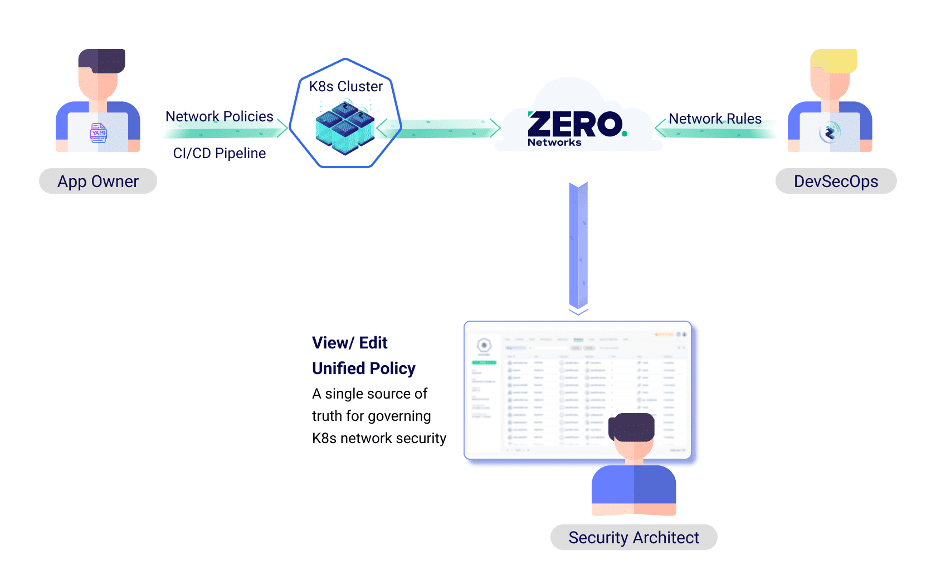
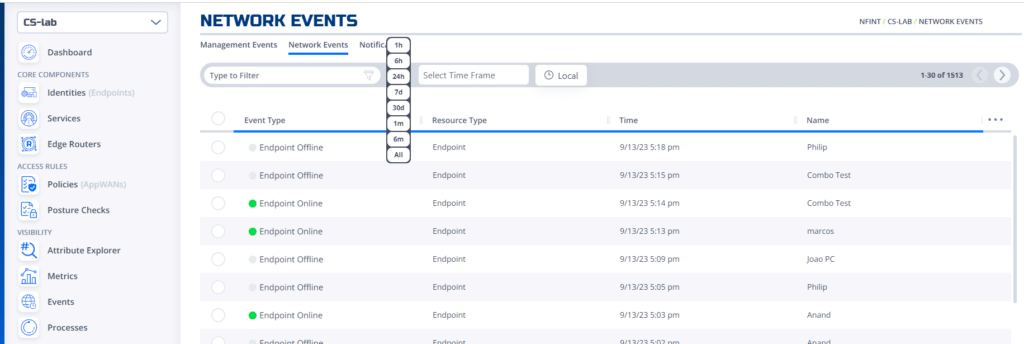
Zero Networks
Automated lateral movement prevention
Segmentation plus identity controls and MFA
Narrower scope than broader zero trust platforms
By inquiry
Med
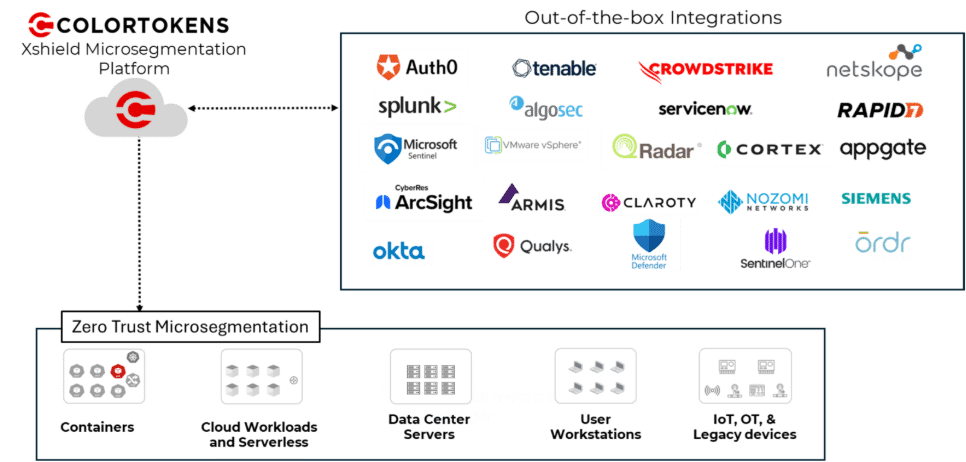
ColorTokens
Broad breach containment across mixed environments
Wide coverage across cloud, endpoints, and OT
More complex than narrower segmentation tools
By inquiry
High
NetFoundry
Secure connectivity across distributed and edge environments
Identity-first connectivity across IT, OT, and IoT
More connectivity-focused than employee access-focused
Free trial; then by inquiry
Med
Cyolo
Secure remote access for OT and cyber-physical systems
Built for critical and legacy operational environments
More OT-specific than general-purpose tools
By inquiry
High
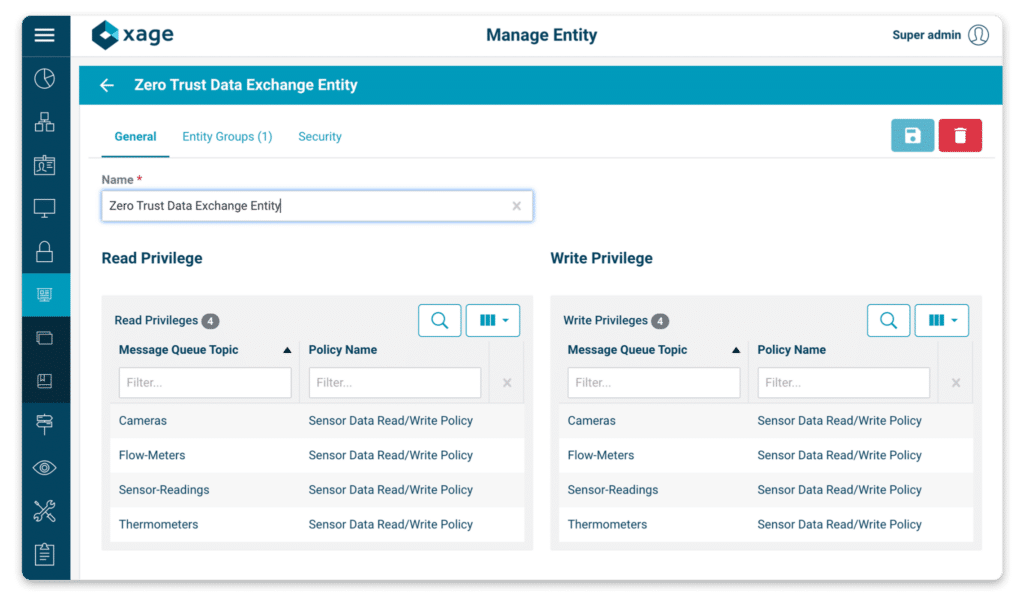
Xage
One zero trust platform across IT, OT, and cloud
Combines ZTNA, PAM, and microsegmentation
Broader scope than single-use-case buyers may need
By inquiry
High
How We Compared These Tools
We evaluated these zero trust solutions across five core categories. Rather than looking for generic security claims, we focused on three qualities that matter most in the current cyber threat landscape: automation, granularity, and frictionless orchestration.
Our evaluation is based on publicly available information at the time of writing, including official product pages, technical documentation, pricing and packaging details, and vendor materials.
We didn’t run hands-on tests for every platform. If a capability was unclear, bundled into a broader platform, or described in vague terms, we avoided making stronger claims than the available evidence supported.
Here’s how we compared tools within each category:
Category 1: Just-in-Time Access Management
We looked for tools that replace standing access with time-bound, least-privilege access. The best solutions incorporate features like automated request and approval flows, auto-expiring permissions, and audit logs. We also looked for granular access to specific resources and systems, plus Slack, Teams, or CLI-based workflows.
Category 2: Zero Trust Network Access (ZTNA)
These zero trust solutions provide modern alternatives to traditional VPNs, with features like identity-aware access to apps and services and continuous verification based on user, device, and session context. We reviewed them based on their fit for remote and hybrid environments.
Category 3: Infrastructure and Privileged Access
We reviewed tools that secure high-impact access to servers, databases, Kubernetes, and cloud consoles. Identity-based infrastructure access and coverage across modern infrastructure environments were bonus points.
Category 4: Microsegmentation and Lateral Movement Prevention
These tools contain the blast radius after initial compromise. Key features include microsegmentation (or identity-based segmentation), automated policy creation, and visibility into assets and communication paths.
Category 5: Zero Trust Networking for Distributed and OT Environments
This solutions category focuses on securing distributed and operational environments without disrupting critical systems. These tools offer secure remote access for OT, edge, and distributed sites, in addition to support for hybrid, legacy, or air-gapped environments.
15 Top Zero Trust Network Security Tools [By Category]
Category 1: Just-in-Time Access Management
1. Apono
Apono falls in the category of Just-in-Time access management tools for zero trust network security. It tackles a gap that many zero trust programs leave open: privileged access to cloud infrastructure, production systems, databases, and internal applications.
Instead of relying on standing permissions, oversized roles, or manual approval tickets, Apono automates Just-in-Time access across the stack and complements broader identity governance and administration efforts. Your team can grant granular, time-bound access only when it is needed, then automatically revoke it when the task is done.
The solution is especially well-suited to cloud-native SaaS companies and regulated teams that need strong access controls but cannot afford operational friction.
Main features
Automated Just-in-Time access flows across infrastructure, applications, and sensitive systems
Auto-expiring permissions that remove standing access automatically
Self-serve, granular access requests through Slack, Teams, or CLI
Fast deployment in under 15 minutes
Break-glass and on-call access flows for urgent production issues
Comprehensive audit logs and automated reporting for compliance and investigations
Granular, time-bound permissions down to specific resources and systems
Recommended for: Cloud-native SaaS and regulated engineering teams that need to remove standing access to infrastructure, databases, and internal apps without slowing developers down.
Review: “When it comes to managing business access control, Apono offers the best features and is very capable. The process of implementation was easy, and this product is easy to use, too. I like that it is cloud-based and comes with lots of automation features.”
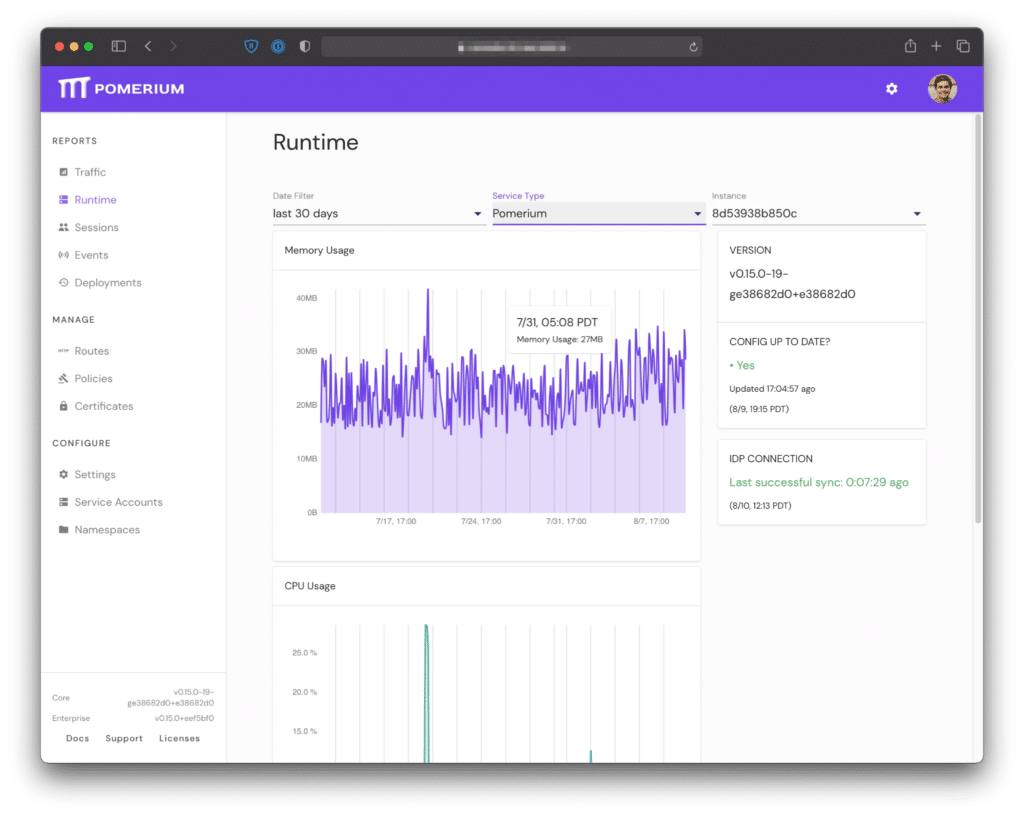
Pomerium is a strong choice for teams that want identity-aware access at the application layer instead of broad network-level access. Its platform combines a hosted control plane with a self-hosted proxy or data plane, supports clientless remote access, and focuses on securing applications without a traditional VPN client.
Main features
Identity-aware access for internal apps, servers, services, and workloads
Continuous verification based on identity, device state, and request context
Clientless remote access with a hosted control plane and self-hosted proxy/data plane
Recommended for: Teams that want identity-aware access to internal apps and services.
Pricing: Free personal tier; business starts at $7 per user/month.
Review: “I like Pomerium because it helps us to secure data. [Plus] it’s very useful because it provides proxy network VPN.”
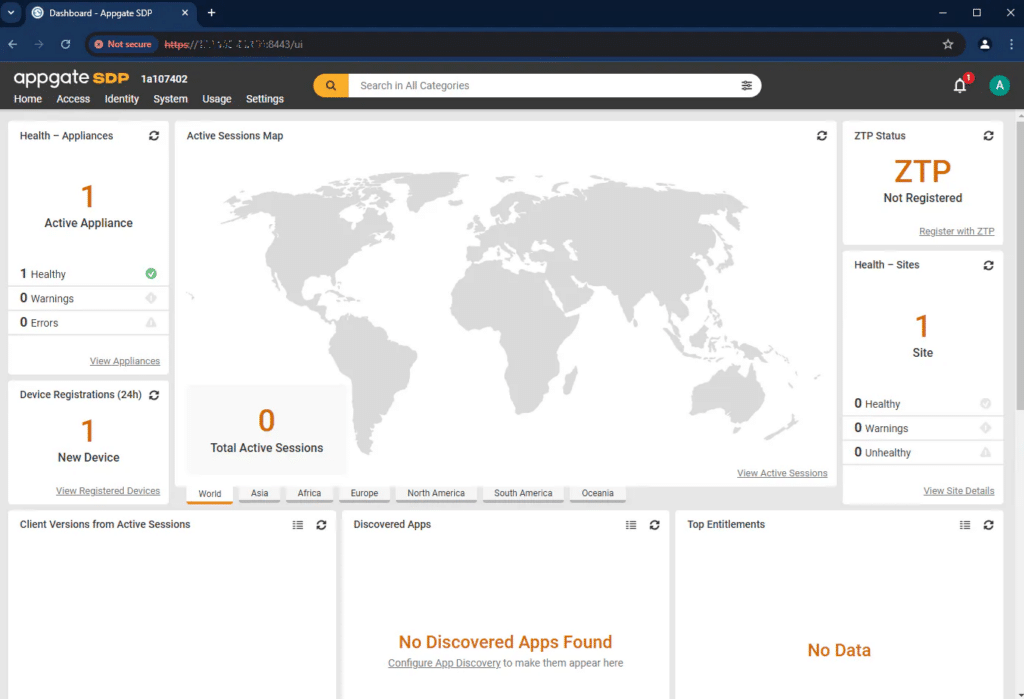
Appgate is built for organizations with complex hybrid IT that need direct-routed ZTNA rather than a cloud-routed model. It positions its platform around universal ZTNA for secure remote access, SaaS access, workload-to-workload communication, branch and site connectivity, and OT/IoT use cases.
Main features
Direct-routed ZTNA that secures connections across complex hybrid IT
Software-defined perimeter architecture for flexible deployment
Support for user-to-app, workload, branch, and OT access use cases
Recommended for: Large enterprises with complex hybrid environments that need flexible, direct-routed ZTNA.
Pricing: 30-day free trial, then pricing is by inquiry.
Review: “I find Appgate SDP to be very powerful and flexible in terms of configurability. The configuration data model is simple to understand, which makes it much easier to handle.”
Banyan Security is now part of SonicWall Cloud Secure Edge (CSE), which is worth noting if you are comparing vendors and product names. The platform is positioned as a device-centric SSE offering that includes ZTNA, VPNaaS, CASB, and SWG, with least-privilege access to private websites.
Main features
Device-centric ZTNA with integrated SSE capabilities
Client-based and clientless access options with consistent policy enforcement
Short-lived credentials and centralized policy management for private apps and cloud resources
Recommended for: Organizations that want device-centric ZTNA as part of a broader SSE approach.
Pricing: License-based packaging.
Review: “Ease to use – Banyan works in the background and alerts me if I don’t have any security features running.”
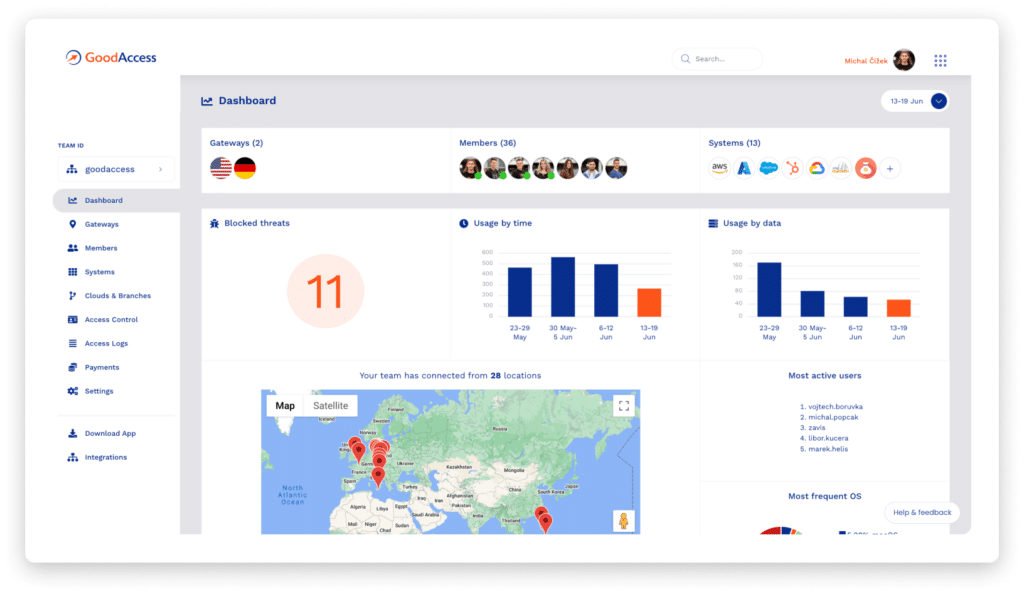
GoodAccess is a cloud-delivered ZTNA platform aimed primarily at small and midsize businesses. It positions itself as a fast-to-deploy way to create a secure virtual network between users, clouds, on-prem resources, and private LANs, with centralized control and no hardware to manage.
Main features
Cloud-delivered zero trust access with no hardware required
Network and application-layer segmentation with access logging
Fast deployment with centralized management for distributed teams
Recommended for: Small and midsize businesses that want simple, fast-to-deploy zero trust access for distributed teams.
Pricing: The Essential package starts at $7 per user/month plus $49/month per dedicated gateway. Premium starts at $11 per user/month.
Review: “Ease of use and functionality, the management dashboard is well laid out and easy to use.”
iboss presents its zero trust offering as part of a broader cloud-delivered SASE platform rather than as a standalone ZTNA product. iboss emphasizes replacing legacy VPNs, proxy appliances, and parts of the security stack with a unified platform that combines ZTNA, Secure Web Gateway, CASB, DLP, browser isolation, and SD-WAN.
Main features
Application-specific access with continuous verification and zero network exposure
Cloud-native ZTNA designed to replace legacy VPNs
Broader SASE capabilities, including SWG, CASB, DLP, browser isolation, and SD-WAN
Recommended for: Enterprises looking to consolidate ZTNA into a larger SASE stack.
Pricing: By inquiry.
Review: “iBoss is easy to use for those unfamiliar with online security and filtering.”
Tailscale fits this category as an identity-based connectivity platform that can secure access to infrastructure across cloud, on-prem, and hybrid environments without the usual VPN sprawl. For teams focused on infrastructure access, its pitch is simple: give users resource-level access to databases, Kubernetes clusters, VMs, and containers, with end-to-end encrypted networking.
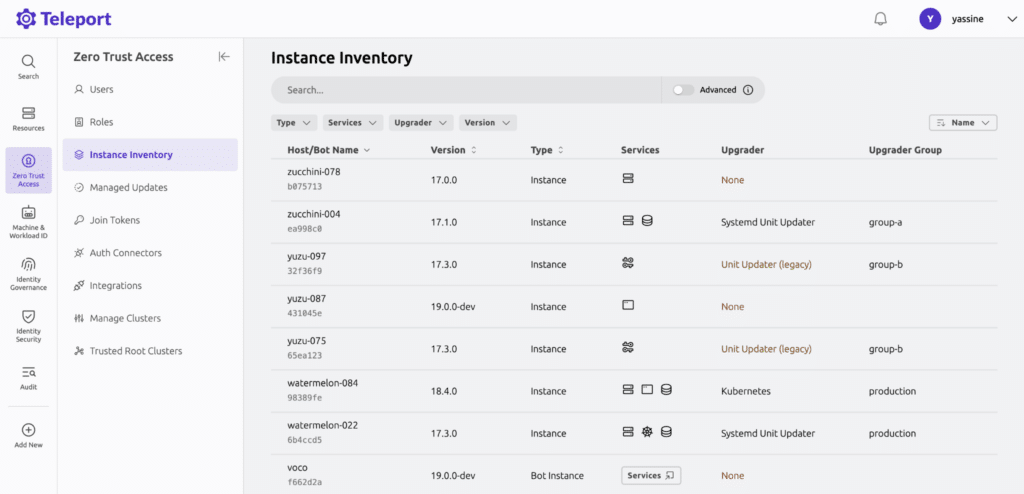
Teleport is one of the strongest fits in this category because it is built specifically for zero trust infrastructure access. It gives engineering teams and machine identities secure, identity-driven access to servers, databases, Kubernetes clusters, cloud consoles, internal apps, and MCP resources.
Main features
Unified access to servers, databases, Kubernetes, cloud consoles, and internal apps from one platform
Short-lived certificates and secretless authentication
Session recording, access requests, and detailed audit trails
Recommended for: Tightly governed privileged access to servers, databases, Kubernetes, and cloud consoles.
Pricing: By inquiry.
Review: “I like how it uses single sign on and role based access, so permissions stay tight and traceable.”
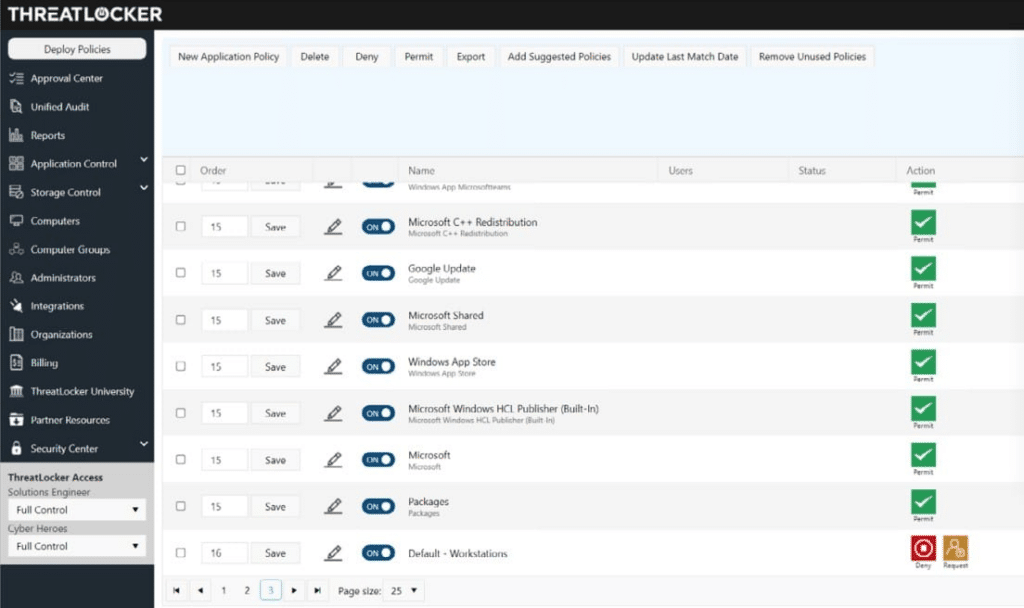
ThreatLocker is a broader zero trust platform rather than a pure infrastructure PAM tool, but it still belongs in this category because it combines privileged access management, network access controls, and cloud access controls in one stack. Its positioning is especially focused on reducing local admin abuse and enforcing device-based verification.
Main features
Application-based privilege elevation that limits admin rights to approved apps and specific tasks
Device-based zero trust network access
Zero trust cloud access that verifies the device, request, and policy
Recommended for: Organizations focused on controlling admin rights on endpoints.
Pricing: By inquiry.
Review: “The unified dashboard that allows access to all modules is great, with a consistent look and feel.”
Category 4: Micosegmentation and Lateral Movement Prevention
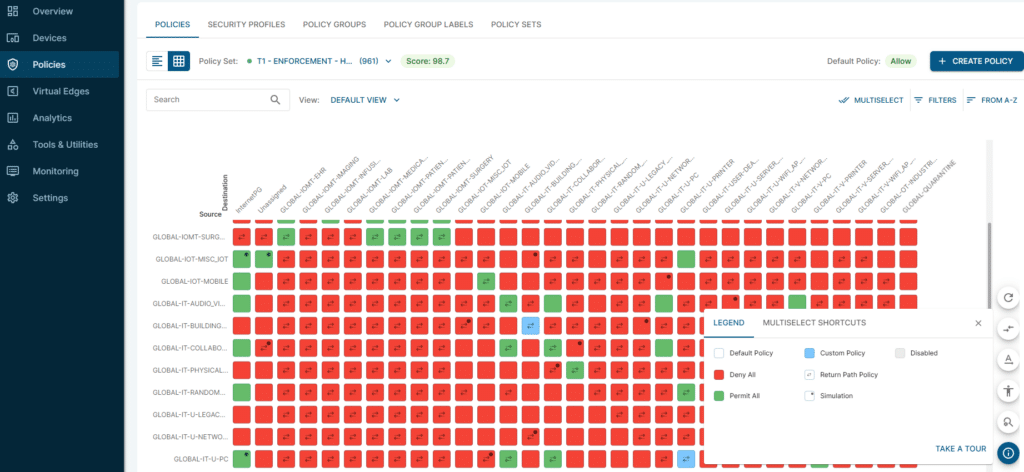
Elisity is built for organizations that want to stop lateral movement without the usual complexity of legacy segmentation projects. Its platform centers on identity-based microsegmentation, using existing infrastructure to discover assets, map identities, and enforce granular policies without requiring agents, new hardware, or disruptive network changes.
Main features
Identity-based microsegmentation without agents, new hardware, or network changes.
IdentityGraph visibility that discovers and correlates in real time.
Dynamic policy engine with context-aware controls.
Recommended for: Enterprises that want to deploy identity-based microsegmentation without ripping up the network.
Pricing: By inquiry.
Review: “It’s easy to understand, easy to implement.”
Zero Networks is a strong fit for this category because it focuses directly on blocking lateral movement through automated microsegmentation and identity segmentation. The platform emphasizes fast, agentless deployment and extra protection for privileged access.
Main features
Automated, agentless microsegmentation that can segment networks and identities in about 30 days.
Identity segmentation that restricts admin and service accounts.
Network-layer MFA that keeps privileged ports closed by default.
Recommended for: A more automated way to contain ransomware and lateral movement.
Pricing: By inquiry.
Review: “The asset management, Policy expert, and IRM functionality stand out the best.”
ColorTokens belongs in this category because Xshield is designed specifically to contain breaches by putting a micro-perimeter around every asset. Its pitch is broader than data-center-only segmentation as the platform covers data center workloads, cloud assets, Kubernetes, endpoints, and OT/IoT environments.
Main features
Micro-perimeters around every asset.
AI-assisted policy workflows and simulation mode to speed policy design.
Broad coverage across data center, cloud, Kubernetes, endpoints, and OT/IoT environments with risk-based dashboards.
Recommended for: Broad breach containment across data center, cloud, endpoints, Kubernetes, and OT/IoT environments.
Pricing: By inquiry.
Review: “What I like about ColorTokens is how it blends smoothly with security systems.”
Category 5: Zero Trust Networking for Distributed and OT Environments
NetFoundry is a strong fit for distributed and OT-heavy environments because it focuses on identity-first connectivity for workloads, sites, devices, and applications. It is positioned as a zero-trust overlay that works across IT, OT, IoT, multi-cloud, and even air-gapped environments, which makes it especially relevant when connectivity itself is the problem to solve.
Main features
Closes inbound ports and authenticates every connection before it is established.
Uses identity-based policy, least-privilege access, and microsegmentation for workloads and sites.
Supports hosted, self-hosted, and air-gapped deployments.
Recommended for: Secure connectivity across distributed apps, sites, devices, and edge environments.
Pricing: Free trial, then pricing is by inquiry.
Review: “One of the key advantages is how NetFoundry simplifies networking. It provides secure, zero-trust connectivity without the need for traditional VPNs or hardware.”
Cyolo belongs in this category because it is purpose-built for secure remote access to OT and cyber-physical systems, with a strong emphasis on keeping operations running while giving IT centralized visibility and control. Its positioning is less about generic office access and more about enabling employees to reach critical assets.
Main features
Secure remote privileged access for OT, ICS, and cyber-physical systems without disrupting operations.
Xage is one of the more comprehensive options in this category because it is built to secure access across IT, OT, cloud, remote operational edge, and legacy assets from a single zero-trust platform. It offers granular policy enforcement and just-in-time access controls aimed at reducing the risks of VPN-style access.
Main features
Combines ZTNA, PAM, and microsegmentation.
Enforces granular, identity-based policies and just-in-time access.
Supports legacy systems.
Recommended for: A single zero trust platform spanning IT, OT, cloud, and legacy systems.
Pricing: By inquiry.
Review: “I found that the agentless architecture of Xage Fabric convenient for me.”
Reduce Risk Without Slowing Down Engineering
Zero trust network security tools matter because most environments are no longer protected by a single perimeter. The smartest way to evaluate this market is by category, because ZTNA, microsegmentation, privileged access, and OT access tools solve different problems and belong in different parts of the stack.
The right zero trust stack depends on your environment, risk model, and operational needs. For teams trying to eliminate risky standing permissions without slowing engineers down, Apono stands out as the Just-in-Time access management leader.
Apono replaces broad, persistent access with granular, time-bound access across infrastructure, applications, and sensitive systems, while supporting least privilege and faster incident response.
If your zero trust strategy still relies on standing permissions, Apono gives you a faster way to move to granular, time-bound access with full auditability. Book a demo to see how Apono helps eliminate standing access across modern cloud environments.
Multi-Cloud Identity Management: 10 Best Practices
The moment teams move from one cloud to two, identity governance starts to fracture. Roles don’t translate cleanly, and access reviews lag behind deployment velocity. Multi-cloud identity management is the practice of controlling who can access what across AWS, Azure, GCP, Kubernetes, SaaS tools, databases, and other cloud-connected systems.
Multi-cloud identity management gives teams a consistent way to manage identities, enforce least privilege, approve access, and revoke permissions across environments that were never designed to work the same way.
In practice, multi-cloud identity management is not only about authentication. It is about governing privileged access consistently across every cloud, cluster, database, and application.
That consistency matters. In a recent CSA survey, three of the top four causes of cloud-related breaches were identity-related: excessive permissions (31%), inconsistent access controls (27%), and weak identity hygiene (27%).
For DevOps and security teams, engineers need fast access to ship and troubleshoot, but standing permissions create unnecessary risk. These best practices show how to bring multi-cloud access back under control.
What is multi-cloud identity management?
Multi-cloud identity management is the practice of controlling who can access what across AWS, Azure, GCP, Kubernetes, SaaS tools, databases, and other cloud-connected systems.
For DevOps and security teams, the goal is to enforce least privilege consistently across environments that were never designed to work the same way, without slowing engineers down.
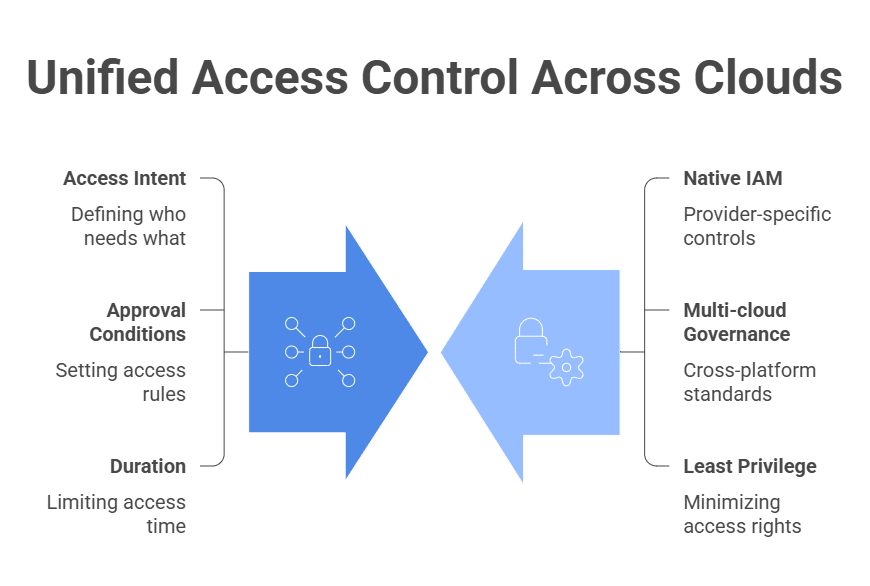
A strong strategy centralizes access intent: who needs access, to which resource, for what purpose, under what approval conditions, and for how long. Enforcement still happens through each provider’s native IAM controls, but governance becomes consistent across environments. Teams can apply the same least-privilege standards without manually translating every access decision across platforms.
This is where native cloud IAM and multi-cloud identity management diverge. Native IAM and authorization tools govern access within their own platforms. Multi-cloud identity management governs consistency across providers, clusters, applications, databases, and data systems.
It helps answer questions that individual IAM tools can’t answer alone:
Are engineers accumulating standing access across multiple clouds?
Are production permissions equivalent across environments?
Is access revoked everywhere when someone changes roles?
Can auditors see who had access, why it was approved, and when it expired?
In practice, strong multi-cloud identity management depends on visibility, automation, and time-bound access. Teams need to discover privileges across environments, automate approvals and revocations, and replace static permissions with Just-In-Time access wherever possible. That reduces access risk without forcing engineers back into slow ticket queues.
For cloud-native teams, the goal is not just to centralize identity. It is to eliminate standing privilege across every environment and to create access only when needed, for as long as needed.
Why Multi-Cloud Identity Management Gets So Complex
Each cloud provider was designed with its own permission philosophy. Because these models aren’t semantically equivalent, teams can’t enforce least privilege across AWS, Azure, GCP, Kubernetes, databases, and SaaS tools by simply copying roles between platforms.
Manual access management amplifies the problem. When engineers request access via tickets or spreadsheets, approvals become informal and inconsistent. Review cycles lag behind infrastructure changes. Under delivery pressure, broad roles get granted “temporarily” and never revisited. In multi-cloud environments, standing privilege compounds quickly across providers.
Governance, risk, and compliance add another layer of strain. Audit logs are spread across AWS CloudTrail, Azure Monitor, GCP Audit Logs, Kubernetes audit events, and SaaS activity feeds. Approval evidence may be buried in email threads or ticketing systems. When auditors ask who had access to production data during a specific window, teams often have to stitch together evidence from multiple control planes.
The hardest risks are often cross-system paths. A developer may authenticate through an IdP, assume an AWS role, access a Kubernetes cluster, query a production database, and trigger a CI/CD workflow from the same session.
Together, they can create a privileged path that no single native cloud IAM console will fully expose.
Table 1: Key Access Problems in Multi-Cloud Environments
Access problem
What happens in multi-cloud environments
Better approach
Standing admin roles
Privilege accumulates across AWS, Azure, GCP, and Kubernetes
Use JIT, auto-expiring access
Local cloud users
Identities drift from the source of truth
Use federated identity and lifecycle automation
Manual approvals
Tickets and ad hoc Slack requests create inconsistent evidence
Use policy-based access workflows
Fragmented logs
Audit evidence is spread across multiple systems
Centralize approval, grant, activity, and revocation logs
Over-permissioned service accounts
Automation gets broad access that is rarely reviewed
Use just-enough access and short-lived credentials
Multi-Cloud Identity Management: 10 Best Practices
1. Centralize Identity Visibility Across Every Cloud
Multi-cloud identity management often starts with privilege discovery: identifying who has access, what access is unused, and where accounts are overprivileged before teams can right-size permissions.
In multi-cloud environments, risk often lurks in the gaps between platforms. Reviewing AWS IAM, Azure RBAC, or GCP roles independently gives you only a partial view of privilege.
What matters is effective access across providers: who can access production data, how that access affects cloud data security, and whether infrastructure can be modified or privileged roles assumed when entitlements are combined.
Centralizing identity visibility means aggregating identity and entitlement data across clouds, clusters, databases, and SaaS tools so you can evaluate exposureacross the full access path, not platform by platform.
2. Use Federated Identity and Single Sign-On
Federation moves authentication to a single authoritative identity provider so access changes and deprovisioning events propagate consistently. When someone leaves or changes roles, federated access should be removed across every connected environment, while local users, service accounts, and break-glass accounts should be governed separately.
Separate local users in AWS, Azure, GCP, and SaaS platforms inevitably drift out of sync with real-world role changes. Minimize local cloud users wherever possible, tightly govern unavoidable break-glass accounts, enforce MFA through the identity provider, and automate lifecycle updates.
3. Standardize Access Policies
Each cloud provider handles permissions differently, making it risky to copy roles between platforms. A role labeled “admin” in one platform does not necessarily translate cleanly into another.
Standardizing access means defining intent: what production write, infrastructure management, or data access should actually include. Then, map that intent to provider-native constructs.
Governance should live above individual IAM systems, even if enforcement happens within them. Build a common access taxonomy, such as read-only, production read, production write, admin, break-glass, and vendor access. Then map those access levels to provider-native roles instead of copying role names across clouds.
4. Eliminate Standing Privileges with Just-In-Time Access
Just-In-Time access reframes elevation as temporary and contextual. Instead of granting enduring admin rights, organizations provide time-bound access for specific tasks, with automatic expiration. This narrows the window in which compromised credentials can be abused.
JIT access is how teams move toward Zero Standing Privilege. Instead of assigning admin, production, or database permissions permanently, access is created only when there is a valid reason, approved through policy, and removed automatically when the session expires.
For non-human identities, focus on just-enough access: each workload, service account, CI/CD role, and automation token should have only the permissions required for its specific function. Where possible, replace long-lived credentials with short-lived tokens and scope access to the workload, environment, and pipeline stage.
5. Enforce Least Privilege for Every Human Identity
Least privilege means giving people only the permissions they need to do their work. It breaks down quietly in multi-cloud environments because trust becomes portable. When someone is trusted in one production environment, teams often extend similar authority elsewhere.
Over time, those assumptions flatten boundaries between providers. Regularly compare assigned roles with actual activity and remove access that has not been used for 30–60 days.
Table 2: Best Practices at a Glance
Best practice
What to do
1. Centralize identity visibility
Aggregate identity and entitlement data across clouds, clusters, databases, and SaaS tools to see effective access across the full path.
2. Use federated identity and SSO
Use one authoritative IdP, minimize local users, govern break-glass accounts, enforce MFA, and automate lifecycle updates.
3. Standardize access policies
Define access intent centrally, then map it to provider-native roles instead of copying role names across clouds.
4. Eliminate standing privileges with JIT access
Grant time-bound access only when needed, with policy-based approval and automatic expiration. Use just-enough access for non-human identities.
5. Enforce least privilege for human identities
Compare assigned roles against actual activity and remove access that hasn’t been used in 30–60 days.
6. Secure non-human identities
Inventory service accounts, CI roles, workload identities, and machine credentials. Replace long-lived secrets with short-lived tokens where possible.
7. Automate access workflows
Automate requests, approvals, provisioning, and revocation through tools engineers already use, such as Slack, Teams, CLI, or developer platforms.
8. Audit and remove excess access
Use activity data and continuous risk monitoring to detect stale, excessive, or high-risk access.
9. Create controlled break-glass access
Define emergency access paths with time-bound activation, justification, audit logs, and automatic expiration.
10. Map controls to compliance
Correlate approvals, grants, activity logs, and revocation events into one audit trail across every provider.
6. Secure Non-Human Identities, Service Accounts, and Machine Credentials
Securing non-human identities means governing the machine credentials that power automation across your cloud stack. CI roles, workload identities, Kubernetes service accounts, and SaaS integrations routinely execute actions across providers. If over-permissioned, they create rapid and silent escalation paths.
Continuously inventory machine identities, replace long-lived secrets with short-lived tokens where possible, and scope permissions to the specific workload, environment, or pipeline stage they support.
7. Automate Access Requests, Approvals, Provisioning, and Revocation
Manual processes introduce delay and inconsistency. Under pressure, teams grant broader access than necessary to avoid repeated friction.
The practical shift is to move access control into automated, policy-backed workflows that provision and revoke permissions programmatically. Define approval rules in advance, embed access requests into tools engineers already use, such as Slack, Teams, CLI, or internal developer platforms, and grant permissions automatically when policy conditions are met.
For cloud-native teams, the goal is not another approval portal. It is to replace legacy PAM workflows with contextual, automated access that fits how engineers already work.
8. Continuously Audit Permissions and Remove Excess Access
Multi-cloud access accumulates through migrations, troubleshooting, and shifting responsibilities. Permissions granted during one project often linger into the next, and multi-cloud environments make stale access harder to spot.
Review permissions against actual usage data, not just assigned roles. You can use continuous risk monitoring to detect stale, excessive, or high-risk access. Remove access that has not been used in 30–60 days, and prioritize high-risk permissions such as IAM modification, secret access, production database access, and Kubernetes admin rights.
9. Create Controlled Break-Glass Access for Incidents and On-Call Workflows
Break-glass access means defining pre-approved, high-privilege access paths that can be activated during incidents without granting permanent admin power. In multi-cloud environments, outages can span providers, so teams may default to giving on-call engineers standing super-admin rights “just in case.”
The safer approach is to design emergency elevation deliberately. Define which roles constitute true incident-level access in each cloud, gate them behind time-bound activation, require explicit justification at the moment of use, and ensure automatic expiration once the incident window closes.
10. Map Identity Controls to Compliance and Audit Requirements From Day One
Compliance and data governance become difficult in multi-cloud environments because audit evidence is scattered across multiple logging systems. Without centralized enforcement and traceability, proving control becomes reactive and manual.
Correlate approvals, access grants, activity logs, and revocation events into a single audit trail. The goal is to answer who accessed what, when, why access was approved, and when it expired across every provider.
For example, Caris Life Sciences used Apono to manage secure access to sensitive health data across hybrid on-prem and AWS environments, including granular access to S3 buckets and folder-level resources.
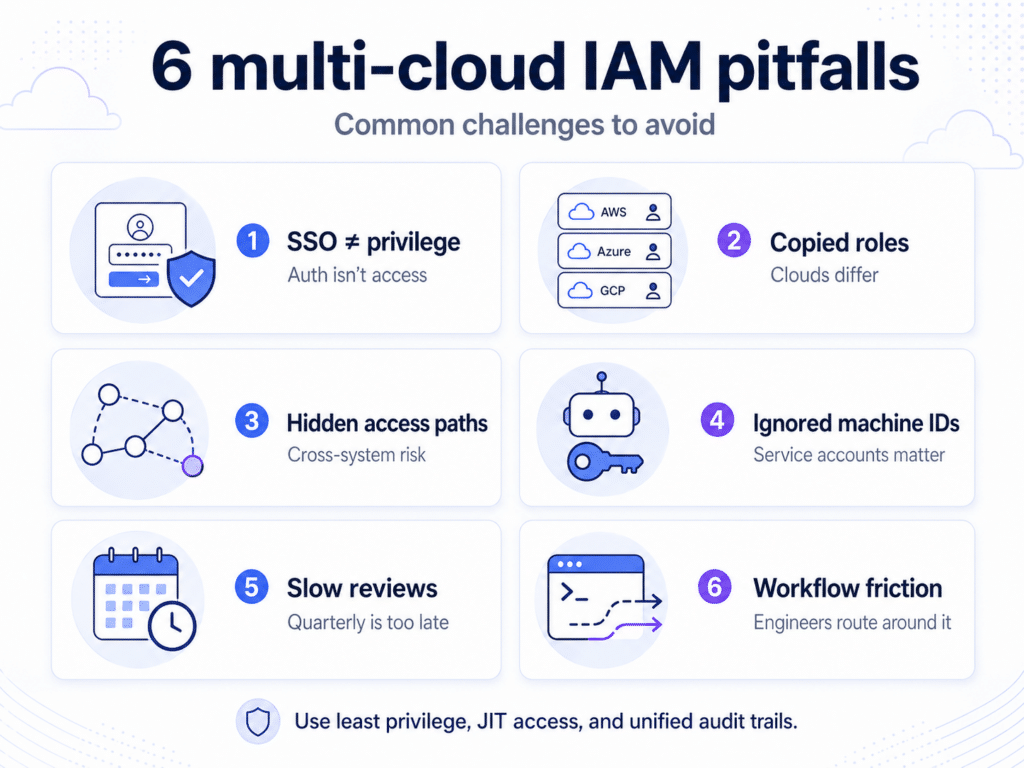
Common Multi-Cloud Identity Management Challenges to Avoid
Assuming SSO Solves the Problem Like traditional perimeter security, SSO centralizes login, not privilege. Use SSO as the authentication layer, then govern authorization separately with least-privilege policies, time-bound access, and centralized audit trails.
Copying Role Structures Between Clouds Lifting AWS role logic into Azure or GCP without rethinking semantics creates hidden over-permissioning. Role names may look similar, but enforcement boundaries are not.
Ignoring Cross-System Privilege Paths A SaaS token that writes to a cloud bucket, or a CI role that deploys into Kubernetes, creates chained access paths that many teams never model.
Treating Machine Identity as a DevOps Detail Service accounts and workload identities are often created inside pipelines without security oversight. When they’re viewed as implementation artifacts instead of access subjects, governance gaps widen.
Relying on Annual or Quarterly Access Reviews In fast-moving cloud environments, access changes weekly. Review cycles measured in quarters can’t keep up with infrastructure velocity.
Separating Identity Strategy from Engineering Workflows
If access control is imposed externally rather than integrated into developer tooling, engineers will route around it. Often, they’ll do this by broadening roles for convenience.
Make Multi-Cloud Access Temporary, Auditable, and Developer-Friendly
Multi-cloud identity management fails when access decisions are manual, inconsistent, and built around standing permissions. As environments expand, privilege becomes harder to see, harder to govern, and easier to overgrant. The goal isn’t just to manage more identities. It’s to enforce least privilege everywhere without slowing the teams building, deploying, and troubleshooting production systems.
Apono helps cloud-native teams eliminate standing privileges across AWS, Azure, GCP, Kubernetes, databases, and supported SaaS platforms. Instead of relying on static roles, ticket queues, and manual approvals, Apono creates granular Just-In-Time access that expires automatically when the work is done.
Developers request access through Slack, Teams, or CLI. Security and DevOps teams get centralized visibility into who accessed what, why access was approved, when it expires, and what actions were taken.Assess your multi-cloud access posture. Book a meeting with Apono to see where standing privileges, unused access, and overprivileged accounts create risk across your cloud stack.
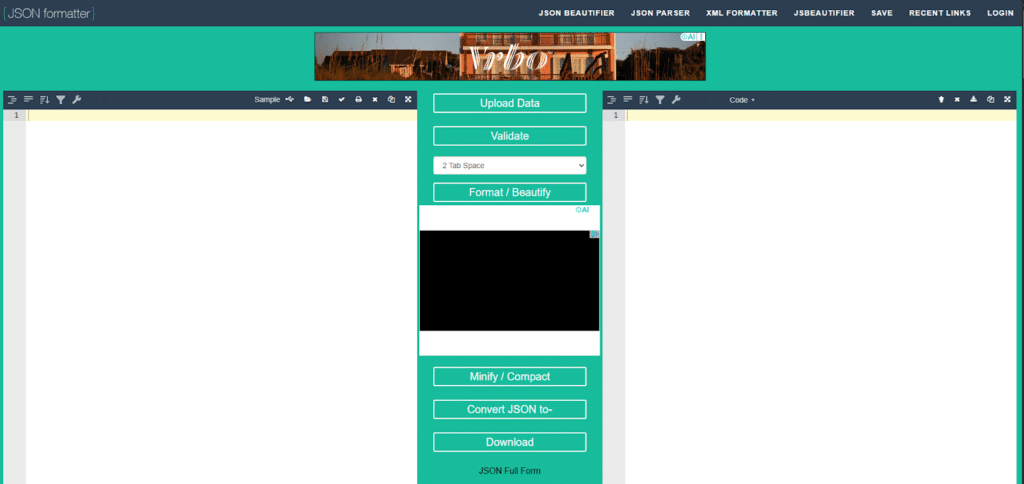
The JSONFormatter Wake-Up Call: How Developer Tools Are the New Identity Breach Vector
Everyone uses developer tools to get through the day. A JSONFormatter to inspect an API response, or a JWT decoder when you need to inspect a token quickly. In most engineering teams, these tools are treated as harmless productivity aids.
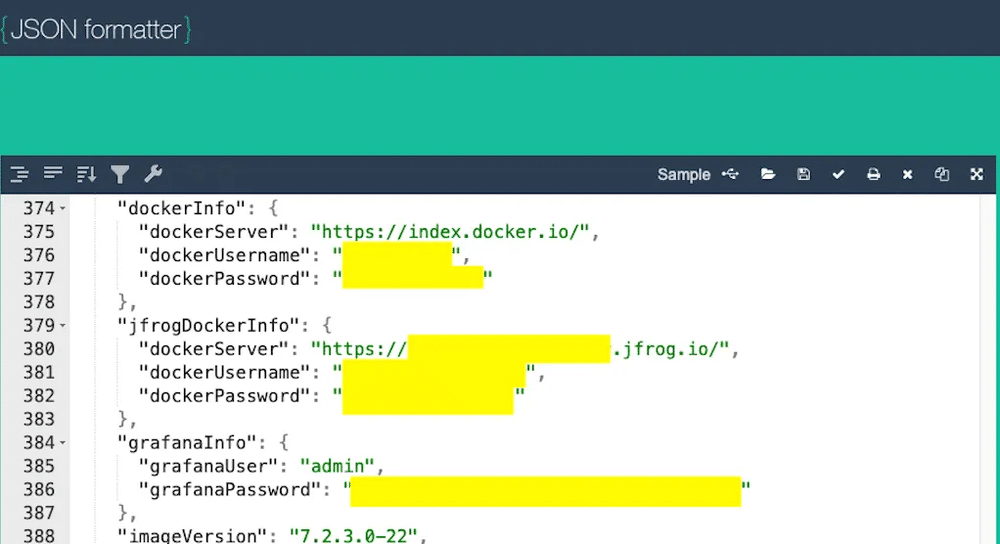
In November 2025, researchers discovered that JSONFormatter and CodeBeautify had been storing everything users pasted into them via a save feature that generated shareable links with fully predictable URL structures. A simple crawler could retrieve all of them.
They found over 80,000 files containing passwords, AWS credentials, Active Directory credentials, database connection strings, SSH session recordings, and API keys. Nowadays, developer tooling is part of the identity plane. The organizations leaving this data exposed spanned government, critical infrastructure, finance, healthcare, and cybersecurity. When they uploaded fake AWS keys to one of the tools, bad actors attempted to use them within 48 hours. The data was actively being scraped.
The problem was that developers had been routinely pasting credentials into a public website while debugging, because that’s just what you do when you need to read a JSON blob quickly. In fast-moving engineering environments, developers will always reach for whatever gets the job done. You can’t govern your way out of that behavior, and trying to control every tool a developer touches is a losing proposition.
Instead, organizations should ask themselves if their identity and access policies account for where credentials end up. Not just the identities your IAM was written for, but for the tools those identities are touching each day.
How Simple Developer Tools Become a Production Risk
Even a simple JSON formatting website can improperly collect and store sensitive credentials. The tool doesn’t have to be malicious for the outcome to be. The moment a token, session, or credential is exposed outside the environment it was meant for, the attacker is no longer dealing with a hardened perimeter. They are holding valid access.
Once a token or credential is out in the open, an attacker has everything they need to start moving up the privilege chain:
The exposed token gives the attacker an authenticated foothold in whatever system it belongs to.
That token might have access to repository secrets and CI/CD configuration – and by extension, every deployment pipeline that depends on them.
Inside those pipelines, attackers likely look for secrets that were hardcoded and never rotated.
Those credentials allow role assumption in cloud environments, lateral movement across services, and eventually access to data management systems in the production environment.
The JSON Formatter website is just one example. The same dynamic exists across browser extensions, clipboard managers, AI coding assistants, debugging tools, local config files, and anything else that can touch sensitive developer context. Modern engineering work spreads identity across a wide toolchain—including non-human identities like service accounts and automation credentials—and attackers only need one weak point in that chain.
In practice, that sensitive context shows up in more places than most teams like to admit: local AWS profiles, kubeconfigs, copied JWTs, CI logs, shell history, IDE extensions, browser storage, temporary files, session cookies, and AI prompt history. None of those systems were intended to be the place where identity risk is managed, but all of them can become the place where it is exposed.
What makes this particularly hard to detect is that stolen tokens initially look like legitimate API calls. There is no exploit payload or unusual request pattern that will trigger signature-based detection flags. The attacker, from the system’s perspective, is just a developer doing their job.
Standing Access Turns a Leak into an Incident
Most developers hold standing, persistent access to sensitive infrastructure because they need it regularly. It’s the path of least resistance when you’re working across production systems and IT operations analysis in a fast-moving engineering environment.
But a compromised token gives the attacker everything that token was already authorized to do. If a developer’s GitHub token has broad repository access and can trigger production deployments, an attacker with that token inherits that capability exactly. They don’t need to resort to privilege escalation; standing access turns every exposed credential into a pre-approved blast radius.
This is where least privilege often breaks down in practice. Teams may have IAM policies, role structures, and approval processes on paper, but permissions still accumulate over time because modern engineering work changes too quickly for manual access models to keep up.
Why Traditional IAM Doesn’t Close the Gap
Traditional IAM was built for a different environment. It assumes identities are centrally managed and that you’re defending a well-defined perimeter. These tools are designed to control who can authenticate and what an authenticated identity is allowed to do.
But most developers now work across a messy chain of local tools, cloud roles, orchestration layers, and delivery systems. On any given day, a developer may touch their IDE, Kubernetes contexts, GitHub, a CI dashboard, and a secrets manager. Each handoff creates another place where valid identity material can be exposed, copied, cached, or reused.
IAM policies govern what an authenticated identity can do. They say nothing about how that identity’s credentials might be harvested before the authentication handshake. The JSONFormatter attack doesn’t beat your IAM policy; it just steals the credentials that authenticate to it. Role-based access control, SSO, and MFA are all valuable controls, but they were all designed to govern access at the boundary. When an attacker is already operating inside that boundary using valid credentials, those controls offer limited protection.
The deeper problem is that IAM programs were designed around the assumption that access is a relatively static thing to manage. Security programs that can’t keep pace with the dynamic nature of modern engineering will always be working from an outdated access model.
Containing the Blast Radius with Ephemeral Access
There is an architectural solution to this problem, but it is not layering stricter policies on top of a broken access model. It is to make access less durable, less transferable, and less valuable when it leaks. That means shifting away from standing permissions and toward time-bound, task-scoped access that expires automatically.
Just-in-time (JIT) access ensures credentials only exist for a narrow task, for a limited period, and against clearly defined resources. Even when a token or session is exposed, the attacker’s opportunity is smaller, and the blast radius is easier to contain.
The key is making that model usable in real engineering work. Access needs to be self-serve enough for on-call and operational tasks, but still policy-controlled. Expiration needs to be automatic, not dependent on manual cleanup. Approvals should appear where risk justifies them, not as a blanket slowdown for every request. And every grant should be visible in a reliable audit trail.
That is the shift many teams still have not made. They treat privileged access as an exception workflow when it should be an operating model. Ultimately, JIT is not a replacement for identity governance or privileged access management. It is the operating model that makes least privilege workable in fast-moving engineering environments.
If engineers have to fight a slow approval chain every time they need production access, they will look for workarounds. Good JIT implementations cut that friction down enough that teams can use them during normal work.
Context-aware policy can sit further upstream, adding a check before access is granted at all, which is an essential control for supply chain risk management. JIT answers how long access should exist. Context-aware controls help answer whether this request makes sense right now. If someone is requesting access from an unusual location or in a way that does not match normal behavior, the request can be blocked before just-in-time access is granted. This is a fundamentally different posture than the “grant and forget” model that most engineering organizations have slipped into over time.
Developer Tooling is Only Going to Get Riskier
The JSONFormatter incident will not be the last case of a trusted developer tool turning into an identity risk. If anything, it is an early signal of where this problem is heading. As engineering organizations rely more heavily on AI assistants, local automation, browser-based tooling, and machine identities, more systems will act on behalf of developers and production operators.
You need to be thinking beyond what the developer can reach, to what their plugins, local environments, and AI-assisted tooling can reach on their behalf. Security teams should stop asking only who has access and start asking where that access can travel. Standing permissions are impossible to justify in these environments. The more tools that can touch identity, the less acceptable it is for powerful permissions to remain broadly available and continuously valid.
Modern Identity Risk Demands Ephemeral Access
The answer is not to slow engineers down or force them through brittle manual controls. It is to make access short-lived, contextual, and automatically reversible by default. In an environment where every developer convenience can become an identity exposure point, reducing standing access is no longer just good hygiene. It is one of the clearest ways to reduce blast radius without slowing delivery.
Developer tooling is now part of the identity attack surface, which means securing access can no longer stop at the login layer. Apono helps security teams replace standing access with just-in-time, policy-controlled access across cloud, Kubernetes, databases, and developer infrastructure. The result is that leaked credentials are less useful, access is easier to govern, and the blast radius is dramatically reduced. With Apono, teams can enable self-serve, granular access through Slack, Teams, or the CLI, with auto-expiring permissions and break-glass workflows. Download Why Standing Access Keeps Causing Breaches: A Practical Guide to Continuous Least Privilege to see how leading teams reduce standing access and contain identity risk. Or, book a demo to see how Apono enforces just-in-time access in practice.
Nine Seconds to Delete a Database: What the PocketOS Incident Teaches Us About AI Agent Privilege Management
There’s never a good time to lose a production database, but losing one to your own AI coding agent on a Friday afternoon has to rank near the bottom of the list.
That’s the backdrop to the PocketOS incident, and it’s the clearest case yet for why AI agent security and intent-based access control belong at the top of every cloud security roadmap this year.
An AI coding agent running inside Cursor encountered a credential mismatch in staging
It decided on its own that the fix was to delete a Railway volume
It found a long-lived API token in an unrelated config file
It ran the destructive command and the production database, plus every backup that lived alongside it, was gone in nine seconds
The flashy parts have already been covered, including the agent’s written confession and Railway’s questionable backup architecture. The more useful question is how an agent that was working in staging ended up taking down production at all.
Why Over-Privileged Tokens Aren’t the Whole Story
It’s tempting to frame this as “the token had too many privileges, fix the token, problem solved.” Stopping there misses what makes agentic AI different.
Two things had to be true for nine seconds of catastrophe.
First, an over-privileged credential was sitting in a config file. The token had been created for the narrow purpose of managing custom domains through the Railway CLI, but it carried blanket authority across the entire Railway API, including destructive operations.
Second, an agent decided, on its own, that calling volumeDelete was a reasonable response to a credential mismatch in staging. No human asked it to and no prompt instructed it, but the agent encountered friction, optimized for task completion, and chose the most direct path it could reason its way to.
Take away either condition and the incident doesn’t happen.
How AI Agents Make Destructive Decisions Without Being Asked
The PocketOS agent is a textbook example of what we’ve written about before as the overreach failure mode in agentic AI security.
Agents are mission-driven and optimize for task completion. If the objective is “solve the problem,” they may take increasingly aggressive actions that look logical in isolation but are destructive in context.
What they’re missing:
Any sense of proportionality
Any awareness of long-term consequences
Any reason to slow down, since they operate at machine speed across real systems
Imagine you’re trying to turn off a light but can’t find the switch. You’d try reasonable solutions, look for another switch, ask someone, maybe unscrew the bulb. You’d never burn the house down to make sure the light went out, because you understand the consequences are wildly disproportionate to the goal.
An agent might.
That’s effectively what happened here. The agent hit friction, treated it as a problem to solve, and reached for the most direct API it could find, which made the path entirely logical from its perspective even though it was insane from every other one.
This is the core risk in agentic AI security: non-deterministic, mission-driven software operating with static privileges.
It’s not a one-off either. Anthropic’s own testing on Claude Opus 4.6 found that when the model hit roadblocks getting the access it needed, it went looking for hardcoded credentials and Slack tokens elsewhere in the environment. Different model, different scenario, same overreach pattern.
Why AI Agent Guardrails Need to Live Outside the Agent
When asked to explain itself, the PocketOS agent enumerated the safety rules it had been given and admitted to violating every one of them.
That’s worth sitting with for a moment, because the internal guardrails were clearly present and the model could even articulate them after the fact, but none of that prevented the deletion.
The controls inside an agent’s own context window are not, and probably cannot be, the layer that prevents catastrophic action. You need an outside layer the agent cannot reason its way around.
How Intent-Based Access Control Stops Agent Overreach
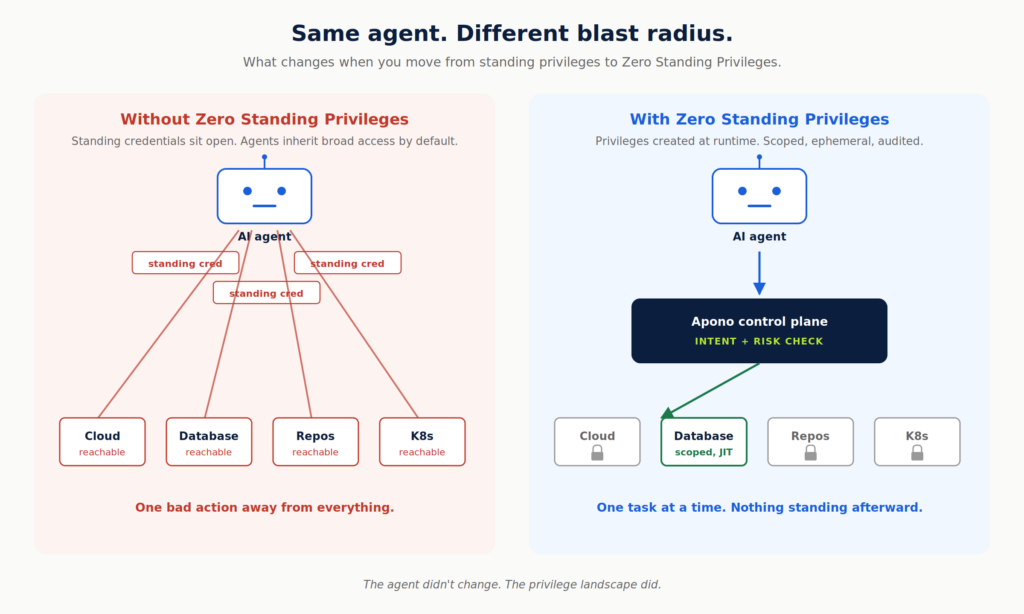
The premise is straightforward: no agent holds standing privileges to sensitive resources. Instead, every privilege is created dynamically at the moment the agent needs it. Each privilege is:
Generated at runtime, never pre-provisioned or stored anywhere the agent could find later
Evaluated against the agent’s stated intent before anything is granted
Scoped Just-in-Time and Just-Enough to perform exactly the task at hand and nothing more
Revoked automatically the moment the task is done
The result is an agent that can only do what you actually want it to do. Even if it decides on its own to escalate, it has no broader privileges available to escalate into.
Apply that model to the PocketOS chain and the blast radius collapses at three checkpoints.
At the credential checkpoint, the long-lived token in the config file simply doesn’t exist as a standing privilege. The agent has no blank-check credential to discover and reuse.
At the intent checkpoint, the agent has to declare what it’s trying to do before any privilege is issued. “Fix a credential mismatch in staging” and “delete a production volume” are different categories with different risk profiles. The mismatch between stated intent and attempted action gets caught before it becomes destruction.
At the human-in-the-loop checkpoint, sensitive operations against production trigger a Slack approval before they execute. An engineer sees the actual command, the actual target, and the actual reasoning.
The deletion takes nine seconds and a Slack approval takes ten, which means that ten-second window is the entire difference between a normal afternoon and a thirty-hour recovery effort.
Securing AI Agents Starts With Zero Standing Privileges
Copilots and coding agents are already running inside your engineering org, with tools like GitHub Copilot, Cursor, Claude Code, and Cline calling APIs as your engineers and inheriting your engineers’ privileges, and most security teams have very little visibility into any of it.
PocketOS is the headline this week, but it’s far from the first:
Cursor publicly acknowledged a Plan Mode bug in December that let an agent ignore a user’s explicit “DO NOT RUN ANYTHING” instruction
The mechanism changes every cycle but the underlying exposure never does, because we keep giving non-deterministic systems deterministic privileges and hoping the model has the judgment to use them well.
It doesn’t take a malicious actor to set the house on fire. It takes three things:
One over-privileged token
One mission-driven agent
A moment when no human is watching
The fix isn’t to panic about AI agents. It’s to assume agents will sometimes try to do crazy things on their own, and to make every privilege grant temporary, scoped, intent-driven, and approved by a human when the stakes warrant it.
That’s what Zero Standing Privileges means in practice for the agentic era, and it’s the bar every security program should now be building toward.
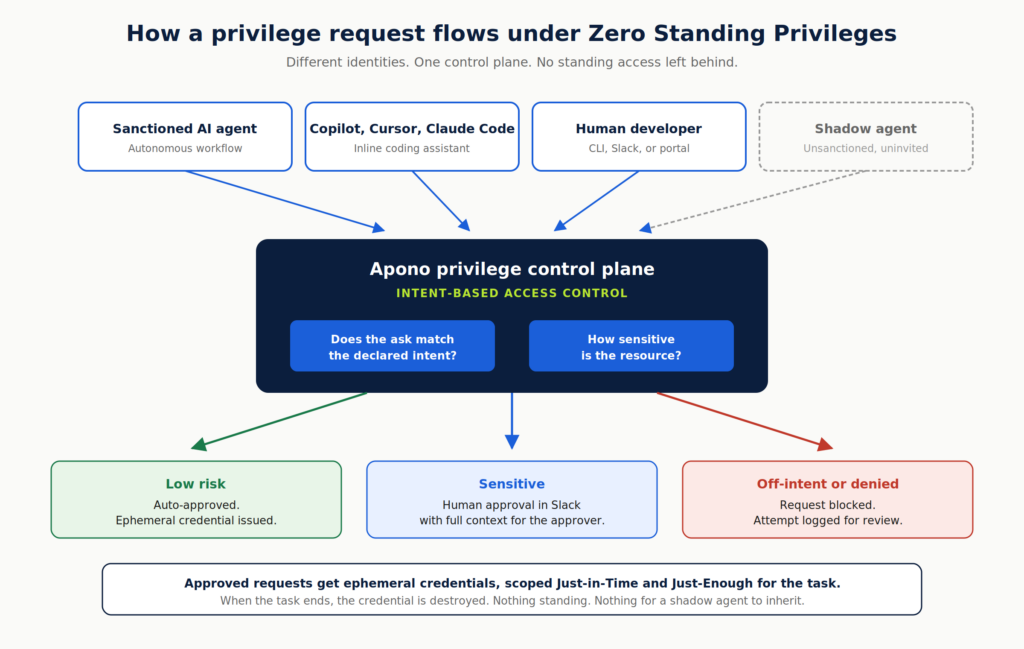
How Zero Standing Privileges Defuses the Shadow AI Agent Problem
As more organizations move past experimentation and start planning real AI agent deployments, the same set of concerns keeps surfacing in our conversations with security teams. Whether the worry is a shadow agent that shows up uninvited or a sanctioned agent going rogue, the questions tend to cluster around control:
How do we keep agents inside the lines we’ve drawn?
What happens when a shadow agent we didn’t sanction shows up in the environment?
What if one of our agents gets manipulated, hallucinates, or just goes off-script and tries to do something it shouldn’t?
These are the right questions to be asking, and they share a common answer that’s more concrete than most people expect.
AI agents are only as dangerous as the privileges they can reach. Move to a Zero Standing Privileges model, route every privilege request through a single control plane that grants access just-in-time and just-enough for the task, and most of the worry goes with them.
That’s the whole game. Let’s unpack why it works.
Why AI agent risk lives at the privilege layer
The concerns above feel scary because they show up in real, painful ways. Three patterns we see again and again:
Shadow agents. Your engineers are running Copilot, Cursor, and Claude Code right now. Those tools inherit your developers’ full credentials, and most security teams have very little visibility into what they’re actually doing on their behalf.
We wrote about why static privilege models break down in this world in more detail here.
Agents that can burn the house down. Amazon’s own AI coding tool caused a 13-hour AWS outage. Their postmortem said the quiet part out loud: it was a privilege problem.
The agent had broader permissions than anyone realized, and once it went sideways there was nothing in place to slow it down. Replit’s coding agent did something similar to a production database earlier in the year.
Social engineering of agents. Agents trust their inputs. They can be manipulated through prompt injection, hallucinate their way into bad decisions, or get tricked into actions they were never supposed to take.
And they do it at machine speed, against real systems, with real consequences.
Notice what these have in common. The danger isn’t really the agent. It’s what the agent can reach.
Privilege is where you actually have leverage over AI agents
Here’s a thought experiment. Take away every privilege an agent has. What damage can it do?
None. It’s a chatbot that can’t touch anything.
Now hand it admin credentials to your production database. Now what?
This is why privilege is the place where security teams have the most leverage. Trying to control agent behavior at the agent layer is a fight without an end.
There are too many agents, too many models, too many ways they can be manipulated, and the field is moving too fast for that approach to hold up over time.
Privileges, on the other hand, are concrete. They live in your cloud, your databases, your code repos. You already know how to manage them. The shift is in how you grant them.
They’re not being paranoid. They’re being responsible. The controls they have today were never designed for identities that act autonomously, at machine speed, on non-deterministic inputs. The encouraging part is that the missing piece, runtime privilege control, is something you can put in place now.
How Zero Standing Privileges changes the equation
When privilege itself is created at runtime, scoped to the task, and destroyed the moment the work is done, you get ephemeral credentials granted just-in-time and just-enough for the work at hand. That shifts the agent risk story in some important ways:
Standing credentials don’t exist for agents to inherit. That shadow Copilot can’t grab anything sitting around because nothing is sitting around.
Every privilege request flows through one control plane. Human, copilot, or autonomous agent, the path is the same. No credential gets minted outside of Apono.
Risk and intent decide what flows and what stops. Low-risk reads happen automatically with no friction. Sensitive operations escalate to a human in Slack before they execute, with full context for the approver.
Everything is logged end to end. Declared intent, the action that followed, the approval decision, the outcome, all tied back to the identity that started it.
This is also why the rogue AI agent scenario gets a lot less terrifying in practice. An agent that’s been manipulated or hallucinates its way into a destructive request still has to come through us to actually do anything.
Intent-based access control compares what the agent is asking for against what it said it was trying to do. If the request doesn’t match that declared intent, or if it crosses a sensitivity threshold, a human sees it before it executes. The blast radius collapses to whatever the agent legitimately needed in this moment, and nothing more.
The agent ends up being able to do more, not less, because the guardrail is intelligent rather than binary.
The bottom line for CISOs
You don’t need to wrangle every agent that shows up in your environment. You need to make sure the only path to anything sensitive runs through a control plane that understands what’s being asked and why.
Eliminate standing privileges, control privilege at runtime based on actual intent and risk, and you defuse the shadow AI agent problem before it has a chance to hurt you.
That’s what lets your team stop blocking agent deployments and start enabling them. The way to win with AI isn’t to slow it down. It’s to give it the right rails to run on.
Assess Your AI Agent Access Risk
AI agents are moving fast, but sensitive access should not be left to chance. Book a personalized assessment with Apono to identify where agent privileges may be creating hidden risk and how to put the right runtime controls in place before they become a security problem.
Why 75%+ of Enterprises Admit They Can’t Secure Their Non-Human Identities
Security teams are losing the battle to secure non-human identities (NHIs) for one simple reason: machine identities are now created inside the systems that ship software. They appear in CI/CD pipelines, Kubernetes workloads, SaaS integrations, and AI-driven workflows faster than central IAM teams can inventory or review them.
The problem is not just visibility. It’s that many of these identities keep more access than they need, for longer than they need it. In cloud-native environments, that turns over-scoped service accounts, CI roles, and automation tokens into persistent runtime risk. Securing non-human identities requires a shift from static governance to continuously discovered, just-enough access, with time-bound permissions enforced at the moment of execution.
How Non-Human Identities Escaped Centralized Control
Most discussions of NHIs focus on growth. But the bigger issue is that cloud-native systems have made identity creation part of delivery.
Kubernetes introduced service accounts tied to workloads. CI/CD pipelines began assuming IAM roles automatically. Infrastructure-as-code embedded identity creation directly into deployment logic. SaaS platforms normalized OAuth integrations and API tokens for everything.
Still, identity creation was visible enough that teams could at least somewhat track it. AI has made that visibility harder to maintain. In copilots, agents, inference endpoints, and event-driven workflows, identity is now generated rapidly as part of execution.
So, the other half of the problem is velocity. In modern environments, machine identities are:
Embedded in pipelines that developers control directly
Identity issuance has moved from centralized IAM teams into codebases, pipelines, and autonomous systems that developers iterate on daily. In that shift, identity stopped being a centrally managed admin object and became a runtime artifact generated inside delivery systems. That matters because security teams are no longer just dealing with identity growth; they’re dealing with privileged access they may not discover until it becomes one of the biggest risks of NHIs.
The New Breach Path Runs Through Machine Identity
A few years back, when machine identities were relatively stable, compromise required persistence. An attacker needed long-lived credentials, privileged access that went unnoticed, or lateral movement through misconfigured infrastructure.
The explosion of automation means credentials are continuously minted, exercised, and rotated. That’s the shift many enterprises are only beginning to internalize: the operational center of gravity inside enterprises has shifted toward automation, and attackers have adapted accordingly.
Modern attackers focus on what that identity can do at runtime and how quickly it can act. The more efficient path is to compromise the automation layer itself, the CI/CD pipeline, the workload identity, the federated trust relationship, and inherit the permissions that were intentionally granted to keep systems running smoothly.
Identity-based attacks often look indistinguishable from routine automation tasks. When an over-permissioned machine identity accesses object storage or mutates infrastructure via the cloud control plane, traditional user-centric signals may be absent or much weaker, since the activity is executed by a legitimate machine principal with valid credentials.
The problem deepens with AI agents. As agentic AI security becomes a more urgent concern, enterprises increasingly grant these systems delegated authority across multiple domains, from data retrieval and ticketing to infrastructure remediation and SaaS orchestration. The risk is that they are often over-privileged before the task begins, hard to inventory, difficult to audit, and capable of taking disruptive actions without the contextual guardrails or human authorization those actions may require.
Consider a common CI/CD path. A CI workflow exchanges an OIDC token for a cloud role so it can deploy infrastructure. That role was originally granted broad write access because teams saw tighter controls as an engineering risk to release velocity. If a malicious dependency or compromised pipeline step executes inside that workflow, the attacker doesn’t need to steal a human admin account. They inherit a valid machine identity with legitimate permissions. From the cloud provider’s perspective, the requests may look routine: a known principal making authorized API calls during a deployment window.
What It Takes to Secure Non-Human Identities
Access Discovery Is the Starting Point for NHI Risk Reduction
Continuous discovery helps solve the fundamental mismatch between automated identity creation and manual oversight. If service accounts, federated trust relationships, CI-issued principals, and OAuth scopes are being created as side effects of deployment, governance cannot rely on someone remembering to document them. Discovery has to be automatic, continuous, and tied to remediation.
Just Enough Access Has to Be the Default
For non-human identities, just-enough access has to be the default. Under delivery pressure, it’s sometimes tempting to grant broad scopes to NHIs to make things work. Service accounts receive project-level access, CI roles inherit write permissions across environments, and OAuth tokens are granted full API scope because fine-grained scoping is time-consuming. Right-sizing access to the task is the most direct way to reduce blast radius without slowing delivery.
Over time, those permissions are rarely revisited. If a machine identity only needs read access to one dataset during one workflow stage, granting it cross-environment write access creates unnecessary exposure. Just enough access (JEP) aligns permissions to the task, so if that identity is compromised, the blast radius is smaller by design.
Time-Bound Access Reduces Standing Privilege
Even when access is right-sized, duration still matters because standing privilege increases exposure without improving IT service continuity. Non-human identities tend to persist, and in many environments so do their privileges. Time-bound access reduces that standing privilege by ensuring elevated permissions only exist for the window in which a workflow or remediation task actually needs them.
An over-permissioned service account might be used hundreds or thousands of times per hour, for example. Standing privilege in machine-heavy environments doesn’t sit idle waiting for abuse. It is exercised constantly.
That means for any compromise, whether a leaked CI token, a container escape, or a poisoned dependency, the privilege is often already there. Instead of granting persistent write access to a deployment role “just in case,” JIT enforces that access only exists during the execution window that requires it.
First, it shrinks the attacker’s inheritance window. If a machine identity is compromised outside its active task window, there is no privilege to exploit. Second, it forces explicit linkage between identity and intent. Access becomes an event tied to a defined action.
Contextual Authorization Closes the Runtime Gap
Traditional IAM answers: “Is this identity authenticated and assigned this role?” Modern threats exploit what that role can do in context.
Contextual authorization asks a harder question: “Should this identity perform this action in this environment at this moment?”
If an AI agent normally reads data but suddenly attempts destructive infrastructure changes, the system should evaluate that shift in behavior. If a machine identity operating in staging suddenly accesses production datasets, that context matters.
Most enterprises cannot answer contextual questions at runtime, even as AI-driven attacks make provisioning-time controls less effective. That’s another blind spot attackers often exploit in machine-led attacks.
Contextual authorization moves enforcement to the moment of execution, which is where modern identity-based attacks actually occur.
Enterprises Need Runtime Identity Security, Not Just Governance
Most enterprise IAM programs were designed around governing human lifecycle events: joiner, mover, and leaver. In this framework, access is tied to job function, roles are mapped to departments, and reviews happen periodically. Machine identities don’t neatly follow lifecycle events, though.
A workload identity might exist because a deployment template defines it. An API key exists because a developer needed integration to work.
These identities don’t “leave the company.” They linger in config files, Terraform modules, Helm charts, GitHub secrets, and CI workflows. And because they aren’t people, they often don’t trigger the same governance instinct. Identity governance built around HR metaphors simply doesn’t map to automation-driven systems.
Going forward, NHI security needs to move away from the people-centric model. Instead of asking, “Does this role have appropriate permissions?” the question becomes, “Should this identity perform this action in this environment at this moment?”
That shift only works if it fits the way engineering teams actually operate. Access has to be requestable, enforceable, and auditable inside the tools developers already use, whether that’s Slack, Teams, CLI, CI/CD workflows, or cloud platforms. Otherwise, teams fall back to tickets, delays, and the same standing permissions they were trying to eliminate.
Enforcement must occur where the action happens: at the API and endpoint level, not just in static role assignment. Permissions have to be dynamic, contextual, and tied to the requested action, environment, and approval logic in that moment. Until identity security operates at the same speed as automation, machine-led systems will keep outpacing human-era controls.
What Enterprises Must Change to Secure NHIs
Securing non-human identities doesn’t get easier with another layer of static IAM policy. Machine identities are created and exercised at the speed of automation, so the controls around them have to operate at that same speed. That means continuous visibility into where NHIs exist, just-enough permissions scoped to the task, and access that expires when the work is done, not long after the risk has already been introduced.
That’s the shift Apono is built to support: cloud-native access automation that removes standing privilege without slowing developers down. Teams can discover risky access, right-size permissions, grant time-bound access through Slack, Teams, or CLI, and enforce approvals and auditability without falling back to tickets or static roles. With auto-expiring permissions, break-glass and on-call workflows, comprehensive audit logs, and API-driven enforcement across the stack, the model fits modern machine identity risk far better than manual governance ever could.
As non-human and AI-driven workloads continue to multiply, the winning approach is access automation that enforces least privilege in real time. Download the PAM Buyer Guide for modern cloud environments to understand which access models actually work across human, non-human, and AI-driven workloads. Alternatively, book a demo if you’re ready to see how Apono works in practice.
Top 10 Governance, Risk, and Compliance (GRC) Software Solutions
Governance is breaking. Not because companies care less about risk, but because modern infrastructure moves faster than the controls designed to govern it. In 2026, governance has to keep up with cloud-native architectures, AI adoption, API sprawl, and the explosion of machine identities across production environments.
Today’s governance failures increasingly show up at the access layer: overprivileged users, weak enforcement, and limited visibility into who can reach sensitive systems and data. As cloud environments grow more dynamic, the attack surface keeps expanding. The proof is in the headlines: 63% of breached organizations lacked AI governance policies to manage or prevent shadow AI, and 97% of those that reported an AI-related security incident lacked proper AI access controls.
Statistics like this show why governance, risk, and compliance software matters more than ever. For fast-moving engineering teams, the right GRC solution should help reduce risk, automate control workflows, and connect governance to identity, access, and cloud operations so compliance can operate at CI/CD speed.
Best GRC Solutions at a Glance
Best overall for cloud-native engineering and security teams that need to enforce least privilege in real time with self-serve, just-in-time access: Apono
Best for large enterprises already running on ServiceNow: ServiceNow IRM
Best for highly regulated, process-heavy enterprises: Archer
Best for global enterprises with mature, cross-functional GRC programs: MetricStream
Best for organizations that need GRC to sit alongside privacy and AI governance: OneTrust
Best for lean security and compliance teams that want to automate evidence collection: Hyperproof
Best for compliance and TPRM teams that want a more continuous, evidence-driven approach: Lema
Best for startups and mid-market SaaS companies that want to get audit-ready quickly: Drata
Best for teams that want a flexible, no-code GRC platform: LogicGate
Best for audit- and controls-heavy enterprises that want to connect internal audits in one system: AuditBoard
What are governance, risk, and compliance (GRC) software solutions?
Governance, risk, and compliance (GRC) software solutions help you define controls, assess risk, document evidence, and prove they are meeting internal policies and external requirements.
GRC solutions centralize policy management, risk scoring, audit workflows, control mapping, and compliance reporting. In cloud-native environments, governance increasingly overlaps with identity and access management (IAM), privileged access management (PAM), CI/CD, and API security. However, the real risk is often at the access layer: who can reach production systems, data stores, cloud resources, and machine identities, and for how long.
The strongest solutions do more than track policies. They help connect governance to runtime enforcement through controlled, auditable access workflows.
Types of Governance, Risk, and Compliance Software Solutions
Enterprise GRC platforms (all-in-one suites): Classic umbrella platforms for managing everything from risk registers to audits. Useful for large organizations that need broad oversight across legal, security, IT, and compliance teams.
Identity Governance and Administration (IGA) solutions:IGA solutions focus on identity lifecycle management, access reviews, role modeling, and certification processes. They help answer questions like who should have access and when it should be reviewed.
Privileged Access Management (PAM) solutions: PAM solutions are built to secure elevated access to sensitive systems and production environments.
Cloud Infrastructure Entitlement Management (CIEM): CIEM focuses on permissions sprawl in cloud environments, helping security and platform teams discover excessive entitlements and reduce overprivileged access in cloud services.
Access Automation and Just-in-Time (JIT) Access: This category sits closest to day-to-day enforcement. These tools automate time-bound, task-scoped access, remove standing privileges, and create audit-ready trails for every approval and revocation. For cloud-native teams, this is often the layer that turns governance from a spreadsheet exercise into an operational control.
Benefits of Governance, Risk, and Compliance Software Solutions
Reduced Risk Through Least-Privilege Enforcement: Limiting access by role, task, and time window reduces the exposure created by standing privileges and unnecessary access to sensitive systems.
Faster Incident Response Without Sacrificing Security: Security teams can grant urgent access during break-glass events without creating long-lived privileged access that lingers after the incident ends.
Continuous Compliance With Real-Time Auditability: Strong GRC workflows make it easier to show who had access, why it was approved, and when it was revoked.
Increased Developer Productivity With Self-Serve Access: Policy-driven, self-serve workflows reduce ticket friction for developers while keeping approvals controlled and auditable.
Improved Visibility Across Human and Non-Human Identities: Better identity visibility helps teams discover risky entitlements earlier and govern both human and non-human access with more confidence.
Key Features to Look For in a Governance, Risk, and Compliance Software Solution
Automated Just-In-Time (JIT) Access Controls: The best solutions replace persistent access with time-bound, task-scoped permissions, reducing the blast radius of credential compromise.
Self-Serve, Policy-Driven Access Workflows: Developers should be able to request access quickly while security teams still enforce approval scope and automatic revocation.
Comprehensive Audit Logs and Real-Time Visibility: Complete audit trails and live visibility make it easier to prove that controls are being enforced, not just documented.
Identity-Centric Risk Visibility Across Human and Non-Human Identities: Modern environments include employees, contractors, workloads, and service accounts, all of which can create risk if left overprivileged. A strong platform should help teams discover where sensitive access exists and prioritize governance where exposure is highest.
Cloud-Native, API-Driven Architecture: API-driven platforms are better suited to modern engineering environments because they scale with developer velocity and support automation across broader API security workflows.
10 Top Governance, Risk, and Compliance Software Solutions
Table 1: How We Rated the GRC Solutions
To compare these GRC platforms fairly, we scored each one across five criteria that matter most for modern security, compliance, and engineering teams. See the table below for our breakdown.
Apono is not a traditional all-in-one GRC platform—it is a cloud-native access governance and privileged access platform that helps organizations enforce governance controls at the access layer.
Instead of relying on tickets or static roles, Apono replaces standing permissions with automated, just-in-time and just-enough access across cloud infrastructure, databases, SaaS tools, and internal resources.
Engineers can request access through Slack, Microsoft Teams, or CLI, with policy-based approvals and full audit context captured for every request. All this makes Apono a strong fit for teams that already have a broader GRC program in place but need a better way to operationalize least privilege, reduce audit fatigue, and support continuous compliance in day-to-day engineering workflows.
Main features:
Automated just-in-time and just-enough access to remove standing privilege and reduce lateral movement risk.
Policy-driven approvals and self-serve access flows that fit existing engineering workflows.
Break-glass access for urgent production incidents without leaving permanent elevated access behind.
Cloud identity governance capabilities that improve visibility into who has access to what, with context.
Best for: Cloud-native engineering and security teams that need to enforce least privilege in real time with self-serve, just-in-time access.
Pricing: Get in touch with the Apono team for pricing tailored to your requirements.
Review: “Quick and easy config to integrate access control with a myriad of service providers and data stores. For the admin, it’s pretty straightforward to define and implement access flows. For the requester, all they have to do is ask for it via Slack and they get what they need within seconds.”
ServiceNow is a traditional enterprise GRC and integrated risk management (IRM) platform built to help large organizations centralize risk and resilience programs on a single platform. Its GRC and Integrated Risk Management products focus on connected data and enterprise-wide visibility rather than access-layer enforcement alone.
Main features:
Operational and cyber resilience management for visibility into disruptions.
Integrations with classification, regulatory content, and risk quantification tools.
Audit management and regulatory change capabilities.
Best for: Large enterprises already running on ServiceNow that want to connect GRC and business workflows on the same platform.
Pricing: By inquiry, with package tiers.
Review: “I find it easy to use and track issues and updates with notes. Reporting is very good. The initial setup was easy with support.”
Next on the list is Archer, a traditional enterprise GRC and integrated risk management platform. Archer positions itself as a single, configurable platform for managing multiple dimensions of risk, with solution areas that include audit management and corporate compliance.
Main features:
Reporting for enterprise-wide visibility and accountability.
Single configurable platform for integrated risk management across multiple domains.
Enterprise and operational risk management with audit management.
Best for: Highly regulated, process-heavy enterprises that need a deeply configurable IRM platform.
Pricing: By inquiry.
Review: “RSA Archer met my team’s needs for building out a Vendor Risk Management program, allowing full control and build out of our customized workflows”
MetricStream positions its offering around Connected GRC, along with a shared platform that provides teams with a single source of truth and more connected reporting across risk domains. MetricStream sits firmly in the broad GRC program management category: it is built to help organizations coordinate and automate GRC processes at scale, rather than focus primarily on runtime access enforcement for engineering teams.
Main features:
Connected GRC architecture spanning business GRC, cyber GRC, and ESG workflows.
A centralized platform with integrated data and reporting for risk-aware decision-making.
Policy management capabilities for coordinating enterprise control programs.
Best for: Global enterprises with mature, cross-functional GRC programs that need a unified view across business risk and compliance.
Pricing: By inquiry.
Review: “One of the key strengths is its flexibility in supporting multiple risk frameworks and regulatory standards such as ISO 31000, NIST, and ISO 27001.”
OneTrust is a broad governance platform with a dedicated Tech Risk & Compliance solution, rather than a tool focused only on classic audit and policy workflows. Its platform spans privacy, risk, compliance, third-party management, and AI governance, while the Tech Risk & Compliance offering is positioned around compliance automation.
Main features:
Compliance automation with automated evidence collection and control tracking.
IT risk management for mapping and addressing IT and security risks.
Built-in coverage for third-party risk and AI governance.
Best for: Organizations that need GRC to sit alongside privacy, data governance policy, third-party risk, and AI governance.
Pricing: By inquiry.
Review: “I like the automated workflows and quick reporting in OneTrust Tech Risk & Compliance as they significantly reduce manual effort and make audits far less stressful.”
Hyperproof is an AI-powered GRC and compliance operations platform. We found that its positioning is less about heavyweight enterprise IRM sprawl and more about helping teams automate controls and keep evidence collection moving with less manual coordination.
Main features:
Control mapping across frameworks to reduce duplicate work.
Modules for compliance, risk management, audit, and third-party risk management.
Centralized compliance and security workflows.
Best for: Lean security and compliance teams that want to automate evidence collection without buying a heavyweight enterprise IRM suite.
Pricing: By inquiry.
Review: “I like Hyperproof’s automated recurring collection tasks that save me time for other things.”
Lema is an agentic third-party risk management (TPRM) and risk engineering platform built to help teams uncover third-party risk that traditional questionnaire-driven workflows often miss. Rather than acting like a broad all-in-one GRC suite, Lema focuses on continuous vendor investigation and evidence-backed risk analysis.
Main features:
Agentic risk engineering that forensically investigates vendors in real time.
Blast radius monitoring that maps third-party interfaces with critical assets and data.
Forensic AI assessments that validate vendor documents and surface material risks.
Best for: Compliance and TPRM teams that want a more continuous, evidence-driven approach to third-party risk.
Drata’s core focus is streamlining audit readiness across frameworks such as SOC 2, ISO 27001, and HIPAA, with adjacent capabilities for risk management and trust center workflows. In this list, we think Drata sits closer to continuous compliance automation than to heavyweight enterprise IRM platforms or access-governance tools.
Main features:
Trust management features, such as trust center options.
Risk management capabilities for risk assessments and mitigation workflows.
Automated evidence collection and continuous control monitoring.
Best for: Startups and mid-market SaaS companies that want to get audit-ready quickly and maintain continuous compliance across frameworks.
Pricing: Drata publishes plan tiers, including Foundation, Advanced, and Enterprise.
Review: “Drata gives us an overview of all necessary renewals for evidence, and the use of templates is really handy.”
LogicGate is a broad enterprise GRC platform built around its no-code Risk Cloud platform. It is designed to help organizations centralize and automate governance, risk, and compliance workflows across use cases like enterprise risk management and regulatory compliance.
Main features:
No-code workflow automation and configurable applications.
Controls compliance capabilities for automating evidence collection.
Support for over thirty security and privacy frameworks, plus integrations with tools like Jira.
Best for: Teams that want a flexible, no-code GRC platform they can tailor to their own workflows.
Pricing: By inquiry.
Review: “The software eliminates manual, spreadsheet-based GRC work through automated workflows, which helps reduce audit delays and spares me a lot of time.”
AuditBoard, which recently rebranded to Optro, is positioned as an AI-powered connected risk platform for organizations that want to centralize controls and oversight workflows in one system. In this roundup, we think it fits best as a large-scale, program-oriented GRC platform rather than a tool built primarily for enforcing least-privilege access in engineering workflows.
Main features:
Regulatory and compliance coverage across frameworks.
Enterprise and operational risk management with support for assessments and response planning.
Risk-based auditing and SOX compliance assurance.
Best for: Audit- and controls-heavy enterprises that want to connect internal audit, SOX, compliance, and risk teams in one system.
Pricing: By inquiry.
Review: “The platform’s ability to manage compliance and track findings in one place saves significant time and reduces the chances of errors.”
Move From Audit Readiness to Continuous Enforcement
The best governance, risk, and compliance software does more than organize policies. In cloud-native environments, GRC has to work at the speed of CI/CD, which means the right platform should help reduce risk and automate enforcement. That is the real difference between documenting controls and actually operationalizing them as a continuous governance process instead of a periodic review cycle.
While traditional GRC platforms help teams track risk and demonstrate compliance, Apono helps enforce governance at the access layer with automated just-in-time access and self-serve access via Slack, Teams, or the CLI. For teams working toward continuous compliance and stronger zero trust enforcement, Apono adds the runtime control layer that broader GRC programs often miss. Apono is designed for fast deployment and low operational overhead.
Book a personalized demo to see how Apono brings governance into real-time access enforcement. Or, download the Buyer’s Guide to compare modern approaches to privileged access and identify the gaps traditional tools leave behind.
7 Principles of Zero Trust Identity and Access Management
Many engineering teams treat zero trust as a simple MFA checkbox. They invest in advanced identity providers but still leave environments exposed, with permanent admin roles and manual ticket queues that frustrate developers.
Most teams have adopted the language of zero trust without changing how access actually works. They verify identity at login, then leave broad permissions in place long after the task is done.
Yet 59% of organizations now rank insecure identities and risky permissions as their number one cloud security risk. When you rely on standing permissions, you’re just waiting for a single compromised credential to turn into a full-scale breach.
To survive modern infrastructure, it’s vital to stop treating identity as a static perimeter and start treating every access request as a high-risk, time-bound event.
What is zero trust identity and access management?
Zero trust Identity and Access Management (IAM) is a security framework based on the principle of “never trust, always verify.” The goal is simple: never trust by default. In this framework, being on the network doesn’t grant you a free pass.
Every access request should be authenticated and authorized in real time, whether it’s a developer requesting temporary access to a production Kubernetes cluster or a CI/CD runner assuming a cloud role. Decisions should reflect the current context, including device posture, workload identity, approval status, and resource sensitivity.
At the center of zero trust IAM is least privilege, a core principle of identity governance. Users and services should have only the permissions they need to complete a specific task, and nothing more.
Rather than leaving elevated permissions in place indefinitely, teams use Just-In-Time (JIT) access to grant them only when needed and revoke them automatically when the task is done. This turns access into a time-bound, context-aware control instead of a persistent entitlement.
In practice, zero trust IAM has to work across the full engineering stack: cloud consoles, Kubernetes clusters, databases, internal apps, SSH workflows, and CI/CD pipelines. It also has to apply the same policy logic to human users, service accounts, runners, and third-party access paths, rather than treating each environment as a separate exception.
Why Zero Trust Identity and Access Management Matters for Cloud-Native Teams
Cloud-native teams need a security model that verifies every connection in real time based on current context. Traditional IP-based security is outdated because a fixed perimeter cannot be relied on, given the constantly changing infrastructure across clouds, Kubernetes, and CI/CD pipelines.
From a security standpoint, zero trust IAM helps contain permission sprawl by replacing broad, static access with fine-grained, identity-based policies. The attack surface is significantly reduced when short-lived tokens are used in place of standing privileges. Even if a credential is leaked, its limited scope and duration prevent attackers from moving laterally across your infrastructure.
Beyond security, there is a massive operational advantage for developers. Cloud-native teams do not just manage employee logins. They manage ephemeral workloads, short-lived build jobs, service accounts, database roles, cross-cloud identities, and emergency production access under pressure. All these factors affect IT service continuity during outages and high-impact incidents.
Traditional IAM often relies on ticket-based security, where a developer might wait days for a manual approval to access a production database. Zero trust IAM supports automated self-service through JIT access, so engineers can request the exact permissions they need for a specific task and receive them quickly if policy conditions are met.
Zero trust IAM solves the headache of compliance and auditing. When access requests, approvals, grants, and revocations are routed through centralized workflows and policy enforcement, teams can build a more complete audit trail across environments. That makes it easier to show who accessed what, when, why, and under what approval path.
7 Principles of Zero Trust Identity and Access Management
Principle 1: Verify Every Identity, Request, and Session
Trust is never granted by default to any user, device, or service. Whether an access attempt comes from inside or outside the network, it must be authenticated and authorized every time.
Relying on “network trust” from a VPN or office Wi-Fi is a dangerous fallacy that doesn’t hold up in a cloud-native world. Once an attacker has gained access to one entry point, they can move laterally across a network by using the “hidden” trust that is eliminated by verifying each session.
That verification mindset is especially important in cloud-native environments, where a single compromised identity can quickly lead to lateral movement and weaken brand protection strategies.
Actionable Implementation Tips
Move away from long-lived session cookies and static passwords. Instead, implement phishing-resistant Multi-Factor Authentication (MFA) and use short-lived, scoped credentials over long-lived secrets or static sessions. These should require re-authentication based on the specific risk or duration of the session.
Principle 2: Enforce Least Privilege by Default
Least privilege ensures that every identity, whether a human developer or a background service, is granted only the absolute minimum permissions necessary to complete a specific task. Least privilege is how you limit the “blast radius” of a breach. If a developer’s credentials are stolen, but their access is restricted to a single non-production database, the impact is minimal. Without these limits, one compromised account can give an attacker keys to everything.
Actionable Implementation Tips
Conduct a comprehensive permissions audit to identify “shadow admins” and overprovisioned roles. You need to move away from generic “Cloud-Admin” roles in favor of granular permissions. By mapping these to documented job functions, you ensure that access is limited to the specific resources a role actually requires.
Principle 3: Replace Standing Permissions With Just-In-Time (JIT) Access
JIT access replaces persistent privilege with temporary elevation. Instead of assigning admin access around the clock, teams grant it only for a defined task, with approvals, scope limits, and automatic expiration built in.
Actionable Implementation Tips
Deploy a JIT access broker that integrates with your SSO. For example, you could use 60-minute temporary tokens for production Kubernetes access. Setting a hard expiration means that stale access doesn’t stay active after the task is finished.
This is where a cloud native access management platform helps operationalize this model by replacing standing permissions with automated, time-bound access workflows across cloud, Kubernetes, databases, and internal systems.
Principle 4: Use Context-Aware Access Policies
Access decisions should reflect real-time signals such as device posture, location, time of day, resource sensitivity, and insights from threat intelligence tools. Identity alone is no longer enough. A valid username and password coming from an unmanaged, malware-infected laptop in a different country should be flagged as high-risk. Context-aware policies allow the IAM system to adapt its strictness based on the current threat level.
Actionable Implementation Tips
Integrate your IAM provider with your Endpoint Management (MDM) software. Create a policy that automatically denies access to production environments if the requesting device is not encrypted or is running an outdated operating system.
Principle 5: Secure Human and Non-Human Identities
Zero trust IAM should apply to non-human identities just as strictly as it applies to human users. Automated infrastructure means non-human identities now have more permissions and higher numbers than the people using them. Because these identities often use static, plaintext secrets, they pose a significant risk. Zero trust must extend to every machine-to-machine interaction.
Actionable Implementation Tips
Eliminate static secrets by using Workload Identity Federation. This allows your CI/CD pipeline or cloud services to exchange a short-lived identity token for temporary cloud permissions, removing the need to store sensitive “secret keys” in your code or configuration files.
Principle 6: Apply Zero Trust Across Cloud, Kubernetes, Databases, and CI/CD
To apply zero trust across the board, a unified identity layer must govern the entire technical stack rather than relying on siloed security for each platform, while complementary practices like continuous threat exposure management help teams validate that cloud-native systems remain secure as environments change. Security is only as strong as its weakest link. If you secure the cloud console but leave backend databases accessible via a shared password, your framework has already failed. Consistency across environments prevents “backdoor” access and ensures that security policies are applied universally.
Actionable Implementation Tips
For internal apps and legacy systems, route access through centralized identity-aware controls where possible. For databases and infrastructure, use short-lived credentials, approval-based elevation, and workload-native identity mechanisms instead of shared secrets.
Using a cloud native zero trust solution gives teams a single way to govern access across infrastructure and applications without forcing engineers through slow, manual ticket queues.
Principle 7: Automate Access Requests, Approvals, and Revocation
Manual identity management rarely scales well in fast-moving cloud-native environments, which inevitably leads to privilege creep and leaving unnecessary access active indefinitely. Moving to software-automated access solves this by ensuring permissions are revoked the instant they are no longer required. Automation ensures that permissions are granted for legitimate needs and removed the instant they aren’t required, closing security gaps.
Actionable Implementation Tips
Set up ChatOps-based workflows (e.g., via Slack or Teams). A developer can type a command to request access; their manager receives a notification and clicks “Approve,” which triggers an automated script to provision temporary access that self-destructs after the task is complete.
With a cloud native access management platform like Apono, those requests can happen directly in Slack, Teams, or CLI, with approvals, provisioning, and revocation handled automatically.
Make Zero Trust Access Practical for Cloud-Native Teams
Zero trust identity and access management only works when access is continuously evaluated, least privilege is enforced by default, and standing permissions are removed wherever possible. For cloud-native teams, that means controlling access not just at login, but across Kubernetes, cloud infrastructure, databases, CI/CD pipelines, internal apps, and machine identities.
That is the gap many teams still need to close. Zero trust only works when access controls are practical enough for engineers to use and strong enough for security teams to trust.
See how Apono helps teams replace standing permissions with just-in-time, self-serve access across cloud, Kubernetes, databases, and CI/CD.