A Step-by-Step Guide to Creating an AWS IAM Policy Document

Ofir Stein
March 5, 2024
Keeping your cloud resources safe from prying eyes and bad actors is a continuous and relentless challenge, making it one of the most critical responsibilities for IT teams.
When it comes to the cloud, scalability is a key challenge. Managing roles and permissions for hundreds or even thousands of employees is daunting, but you can’t afford to slip up when 49% of breaches involve stolen credentials.
To keep up with the scale, speed, and flexibility of cloud IAM requirements, many administrators leverage web services to assist in managing access to cloud environments. An AWS IAM policy document, a feature of AWS’s IAM ecosystem, is one way to keep unauthorized individuals away from your cloud data.
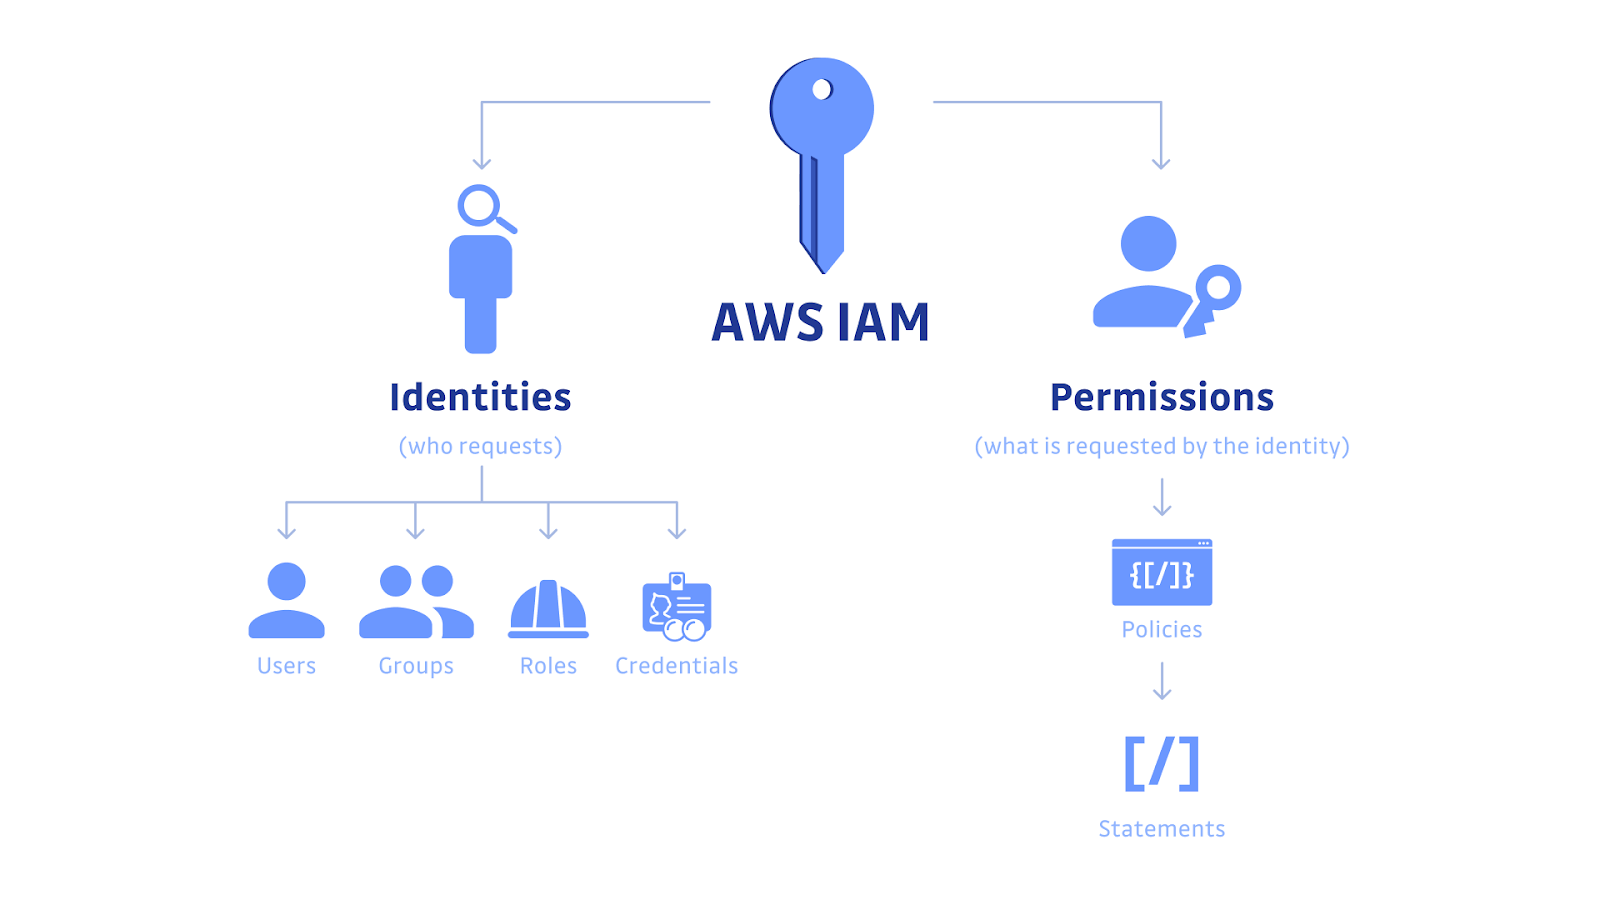
What is AWS IAM?
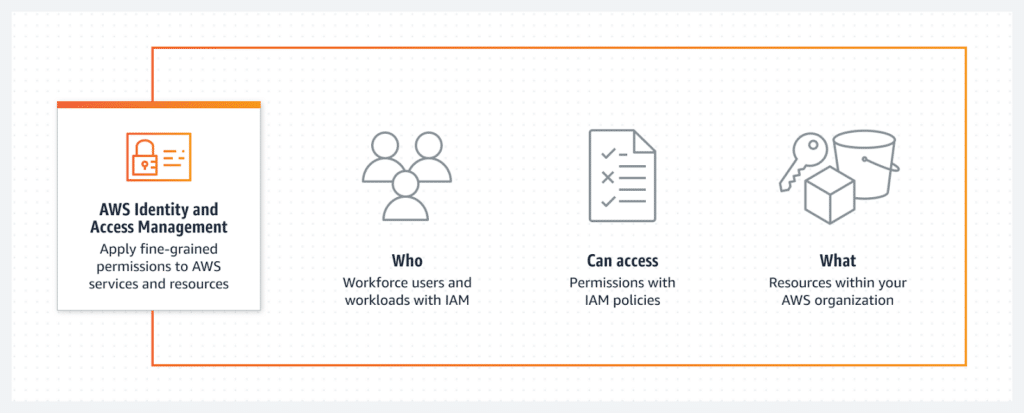
AWS Identity and Access Management (IAM) is a service that allows you to control access to your AWS services and resources securely. It enables you to create and manage user accounts, assign individual permissions, and enforce strict policies to protect your valuable data.
What are AWS IAM Policies?
AWS IAM policies are documents that play a critical role in defining permissions and access controls within your AWS environment. They help you manage and secure your AWS resources by allowing or denying specific actions for different users or groups. With the right IAM policy in place, you can ensure that only authorized individuals have access to sensitive data and critical resources.
To understand IAM policies better, let’s break down the components of an IAM policy document.
6 Types of AWS IAM Policies
There are a few different policy types you can use in AWS:
- Identity-based policies: Grant permissions to the relevant identities (e.g., users, groups, or roles).
- Resource-based policies: Decide which specific actions can be performed on certain resources and define the conditions that the action applies to.
- Permissions boundaries: Define the maximum permissions that an identity-based policy can grant to an entity.
- Organizations SCPs: Define the maximum permissions for account members of an organization using an AWS Organizations service control policy (SCP).
- Access control lists (ACLs): Control which principals in other accounts can access the relevant resource that the ACL is attached to.
- Session policies: Limit the permissions that the role or user’s identity-based policies grant to the session.
What is an AWS_IAM_Policy Document?
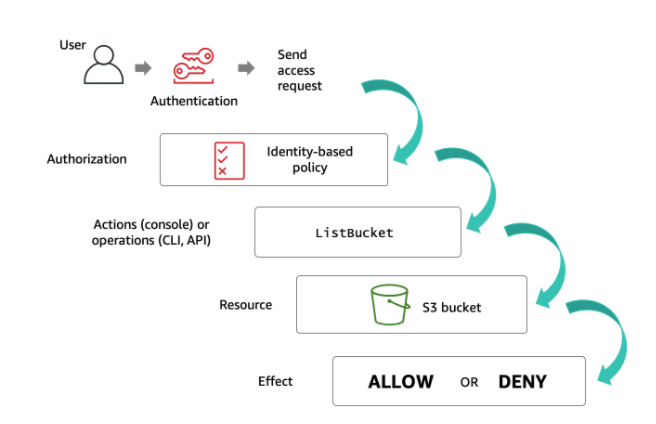
An IAM policy document consists of several key components that define the permissions and access controls:
- Version: The version of the IAM policy language being used.
- Statement: The main section of the policy document that contains one or more policy statements.
- Policy Statement: Each policy statement defines the permissions and access controls. It consists of the following elements:
- Effect: This can be either “Allow” or “Deny” and determines whether the policy statement allows or denies access.
- Action: Specifies the AWS service actions that are allowed or denied.
- Resource: Specifies the AWS resources to which the policy statement applies.
- Condition: Allows you to define additional conditions for granting or denying access.
A Step-by-Step Guide to Creating an AWS_IAM_Policy Document
You can use the AWS Management Console or the AWS Command Line Interface (CLI) to create an IAM policy document. In this guide, we’ll use the AWS Management Console for simplicity.
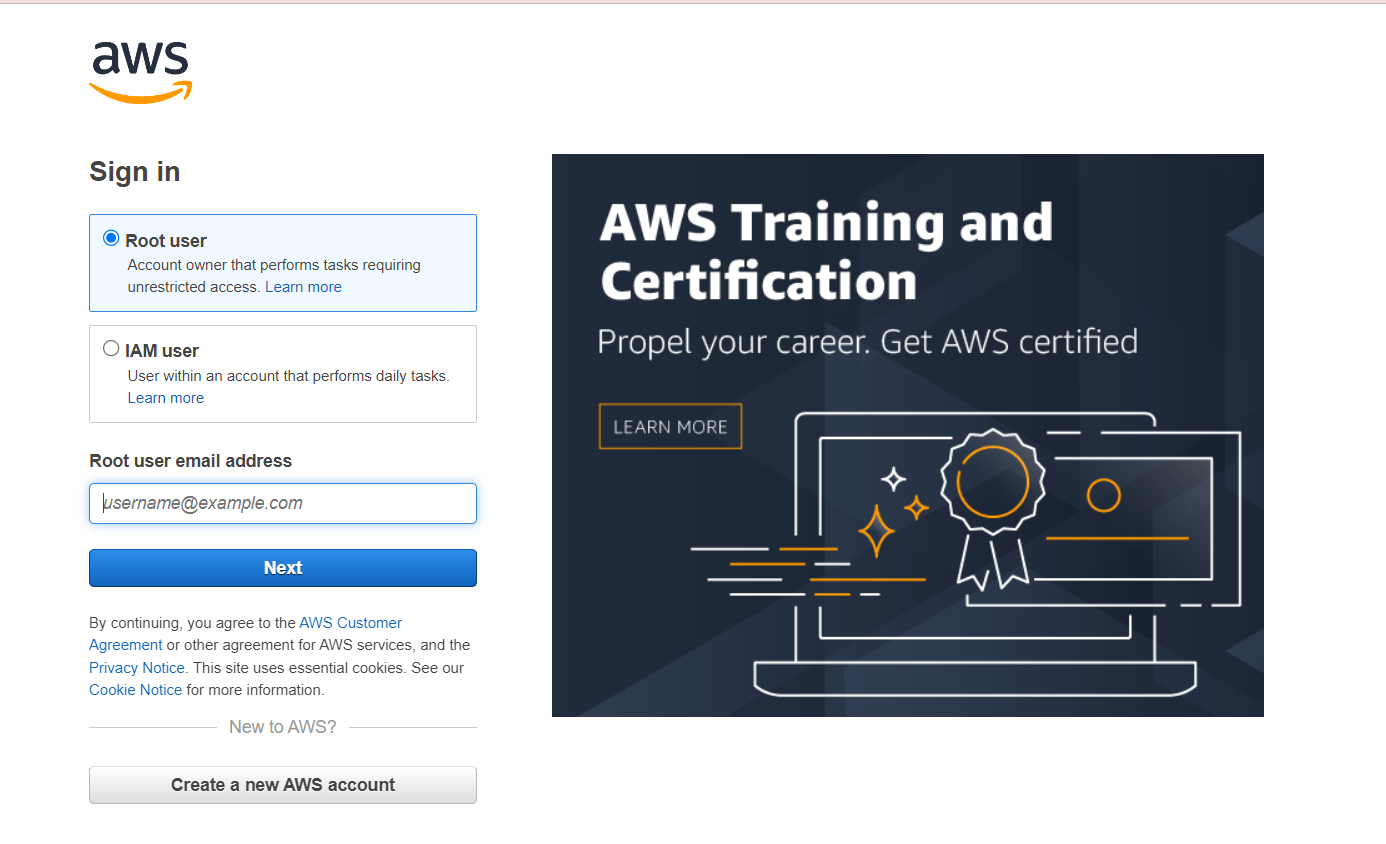
Step 1: Accessing the IAM Console
Log in to your AWS Management Console and navigate to the IAM service to get started. Once you’re in the IAM console, you can begin creating your IAM policy document.
Step 2: Creating a New IAM Policy
In the IAM console, click “Policies” in the left-hand menu and then click the “Create policy” button. This will open the policy creation wizard.
Step 3: Defining Policy Statements and Actions
In the policy creation wizard, you’ll be prompted to define the policy statements and actions. You can choose to allow or deny specific actions for different AWS services and resources. This is where you specify the permissions and access controls for your IAM policy document.
Step 4: Specifying Resources and Conditions
After defining the policy statements and actions, you can specify the AWS resources the policy applies to. This action allows you to control access to specific resources based on your organization’s requirements.
Additionally, you can add conditions to the policy to refine access controls further. Conditions allow you to specify additional factors that must be met for the policy statement to take effect. For example, you can set conditions based on IP addresses, time of day, or other attributes.
Step 5: Reviewing and Saving the IAM Policy
Once you have defined the policy statements, actions, resources, and conditions, you can review the policy details and make any necessary changes. After reviewing, you can save the policy and give it a name.
Step 6: Attach the IAM Policy to Users, Groups, or Roles
Now that you have created an IAM policy document, you need to attach it to the appropriate users, groups, or roles within your AWS environment.
To attach an IAM policy, go to the “Users,” “Groups,” or “Roles” section in the IAM console, select the desired entity, and click on the “Attach policy” button. You can search for and select the policy you created from there.
Step 7: Test and Validate the IAM Policy
Before deploying your IAM policy document, testing and validating it to ensure it functions as intended is crucial.
AWS provides a simulation tool that allows you to test your IAM policies before applying them. The IAM policy simulator lets you simulate various scenarios and evaluate the access permissions for different AWS services and resources.
By running simulations and reviewing the results, you can identify any issues or unintended consequences of your IAM policy document. This helps ensure that your policies are correctly configured and align with your organization’s security requirements.
5 Best Practices for IAM Policy Management
Now that your AWS IAM policies are successfully set up, the work isn’t quite over yet. Here are some IAM best practices to manage your policies effectively.
- Regular Review: Regularly review and update your IAM policies to reflect any changes in your organization’s security requirements or resource access.
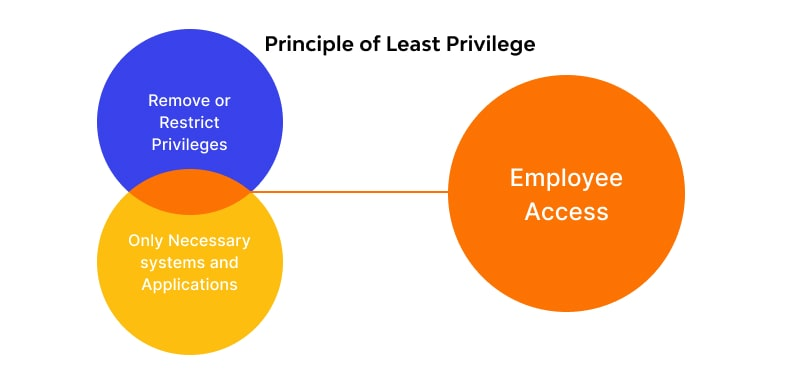
- Least Privilege: Follow the principle of least privilege, granting only the necessary permissions for users, groups, or roles to perform their specific tasks.
- Separation of Duties: Implement separation of duties by assigning different policies to different users or groups to prevent unauthorized access.
- Policy Versioning: Use policy versioning to track and manage changes to your IAM policies over time.
- Audit Logging: Enable AWS CloudTrail to monitor and log all API activity related to your IAM policies.
Alternatively, Do It All Without Leaving Slack
Creating an AWS IAM policy document is a crucial step in enhancing your AWS security. By understanding the components of an IAM policy document, creating and attaching policies, and following best practices, you can effectively manage and secure your AWS resources.
Whether you’re an AWS beginner or an experienced user, this step-by-step guide has equipped you with the necessary knowledge to create and implement an AWS IAM policy document that aligns with your organization’s security requirements. Strengthen your AWS security today by creating robust IAM policies that safeguard your critical resources and data.
Integrate Apono with AWS
Apono integrates with AWS natively, which allows you to manage access to your S3 buckets, IAM roles and groups, EC2, EKS clusters, RDS instances, and many more.
When you integrate Apono with AWS, you can harness:
- Automatic de-provisioning: Eliminate the need to manually de-provision tasks with time-restricted access workflows.
- Reduction in over-privileges: Discover existing privileges granted to AWS roles, groups, and services and convert them to on-demand access flows to reduce over-privileges.
- Self-service access: Empower your developers to gain self-service access to AWS services, buckets, instances, and more using Slack.
- Automated approval workflows: Create approval workflows for specific sensitive resources.
- Restricted third-party access: Grant third-party (customer or vendor) time-based access to specific S3 buckets, RDS, or EC2 instances with MFA verification.
- Access reviews: The detailed access audit shows you who was granted access to which specific instances, buckets, or other resources in AWS.
Apono helps you avoid the tedious task of entering the AWS Identity Center admin console every time you need to grant or revoke access. With Apono, users can request and reviewers can grant permissions – without leaving Slack.
Get started with Apono for free.